
Starting out: the welcome screen
When you launch Paint 3D, you are greeted with a simple welcome screen offering three ways to begin your project:
-
1
New Project
Opens an empty white canvas. If you are following along with this guide for the first time, choose this option. You can explore the other options later.
-
2
Open Existing File
Opens the Windows file browser so you can load an existing Paint 3D project, a saved 3D model, or a picture you want to edit.
-
3
Paste from Clipboard
If you already copied an image or screenshot (using Ctrl+C), this instantly creates a new project with your picture placed right onto the canvas.
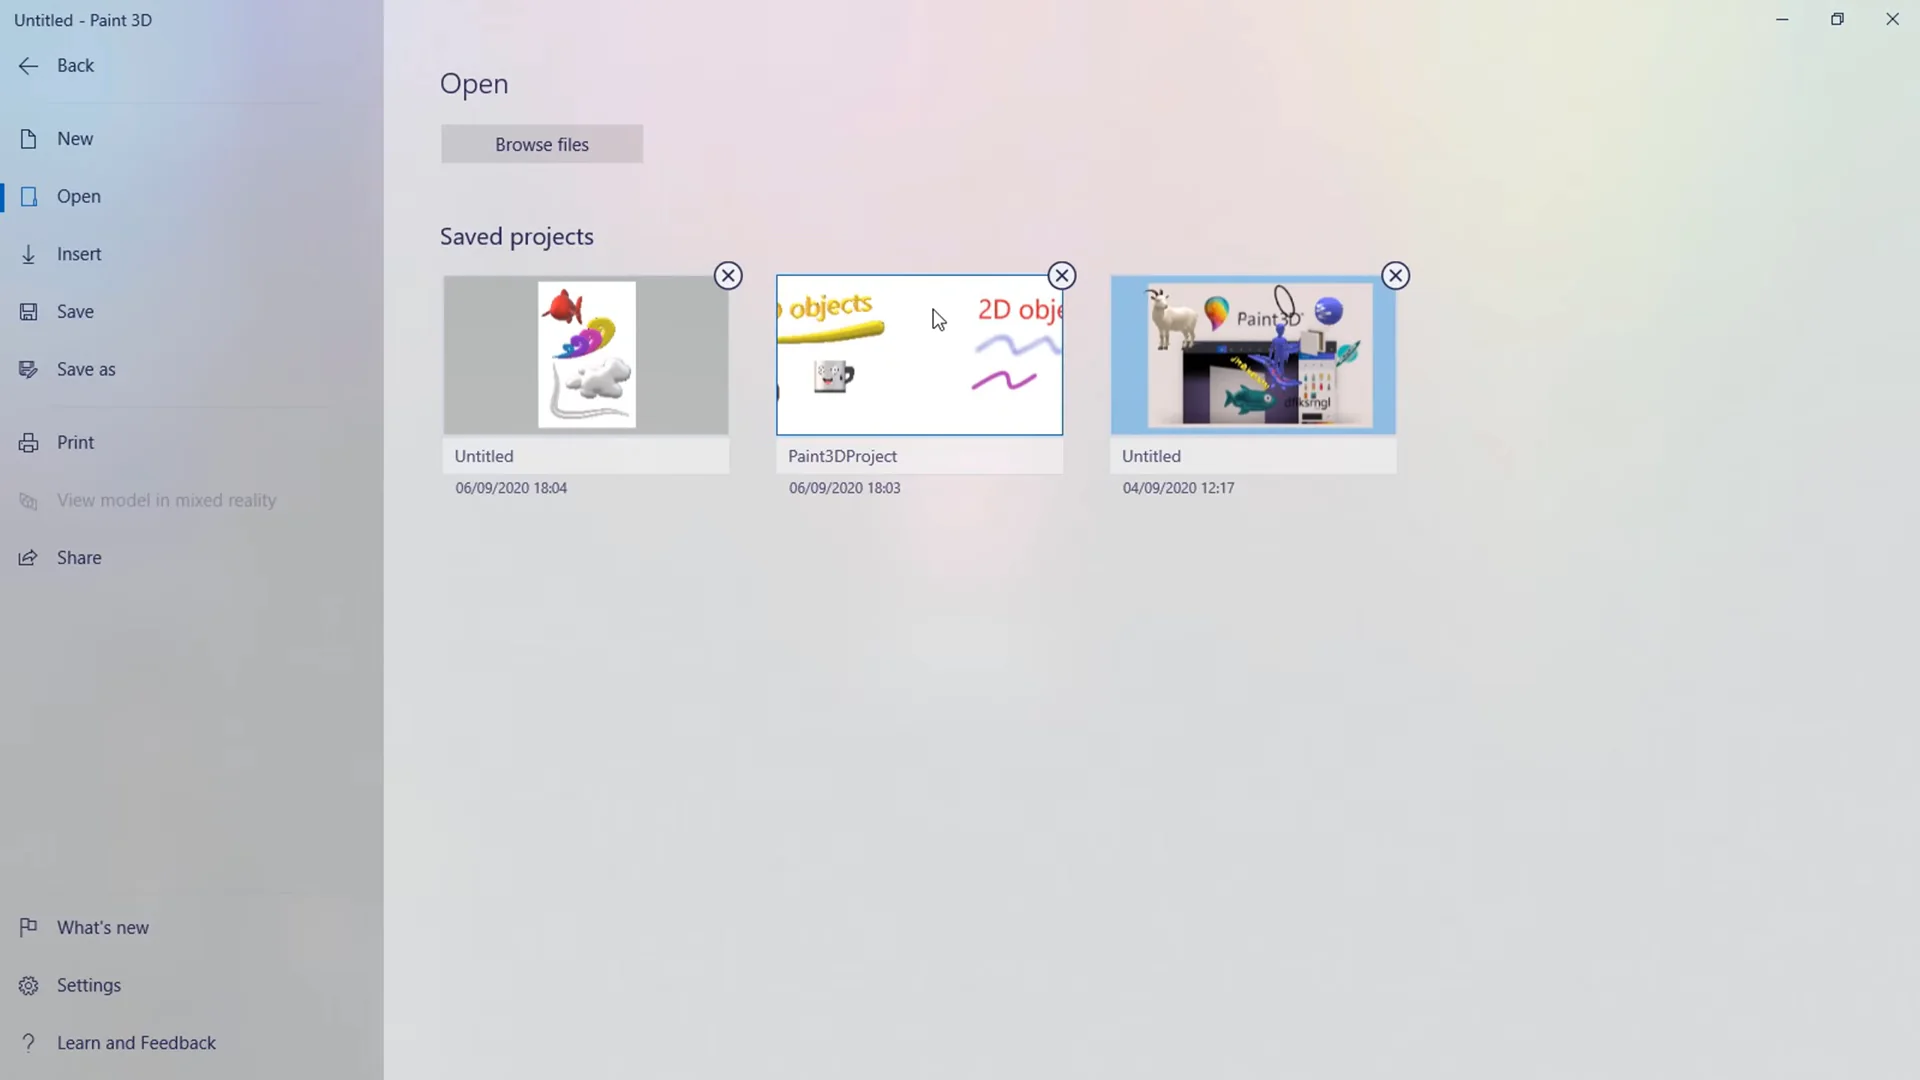
Figure 1: The Paint 3D welcome screen lets you start fresh, open an existing file, or paste whatever is currently copied to your clipboard.
Getting familiar with the Paint 3D window
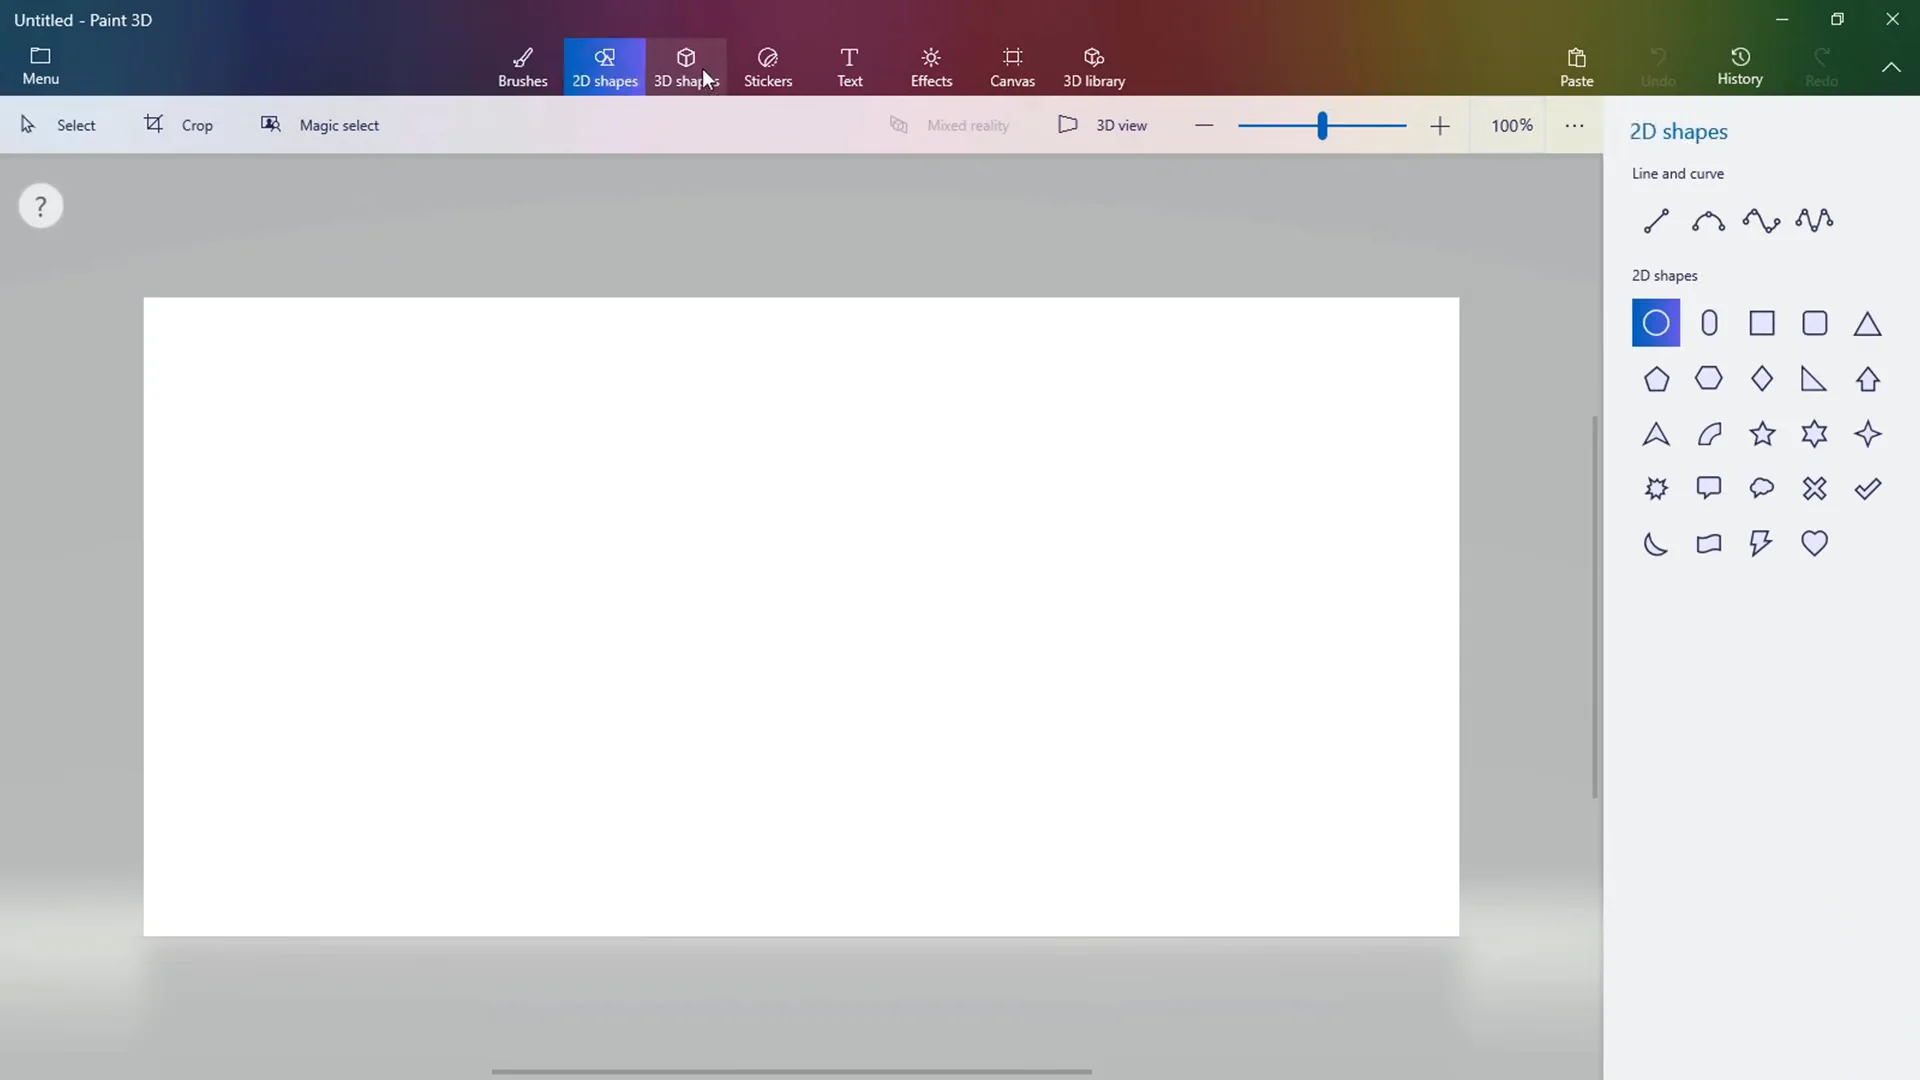
Paint 3D is fairly simple once you know where everything is. You will spend most of your time working between three main areas:
1. The Top Ribbon
Switches between tool categories: Brushes, 2D shapes, 3D shapes, Stickers, Text, Effects, and Canvas.
2. The Right Sidebar
Updates automatically based on what you select. If you pick a brush, it shows stroke thickness and colors; if you pick a 3D model, it shows materials and rotation.
3. Central Canvas
Your drawing surface. Scroll your mouse wheel forward to zoom in for fine detail, or backward to step back and view the full composition.
Importing, moving, and resizing pictures
You do not have to start with a blank screen. You can bring in any photo, sketch, or screenshot using these straightforward steps:
-
1
Paste or Insert a Picture
Press Ctrl+V to drop whatever image you have copied straight onto the canvas, or go to Menu > Insert (or Open > Browse files) to pick a saved picture from your PC.
-
2
Move the Image on Canvas
Click anywhere inside the image's border and drag it where you want it.
-
3
How to Resize an Image in Paint 3D
Drag any of the white corner handles. Hold down the Shift key while you drag so your picture does not stretch or distort out of proportion.
-
4
How to Rotate in Paint 3D
Click and drag the circular handle at the top center of the picture box to spin it to any custom angle. For a quick turn, you can also use the Rotate 90° or Flip buttons in the right sidebar.
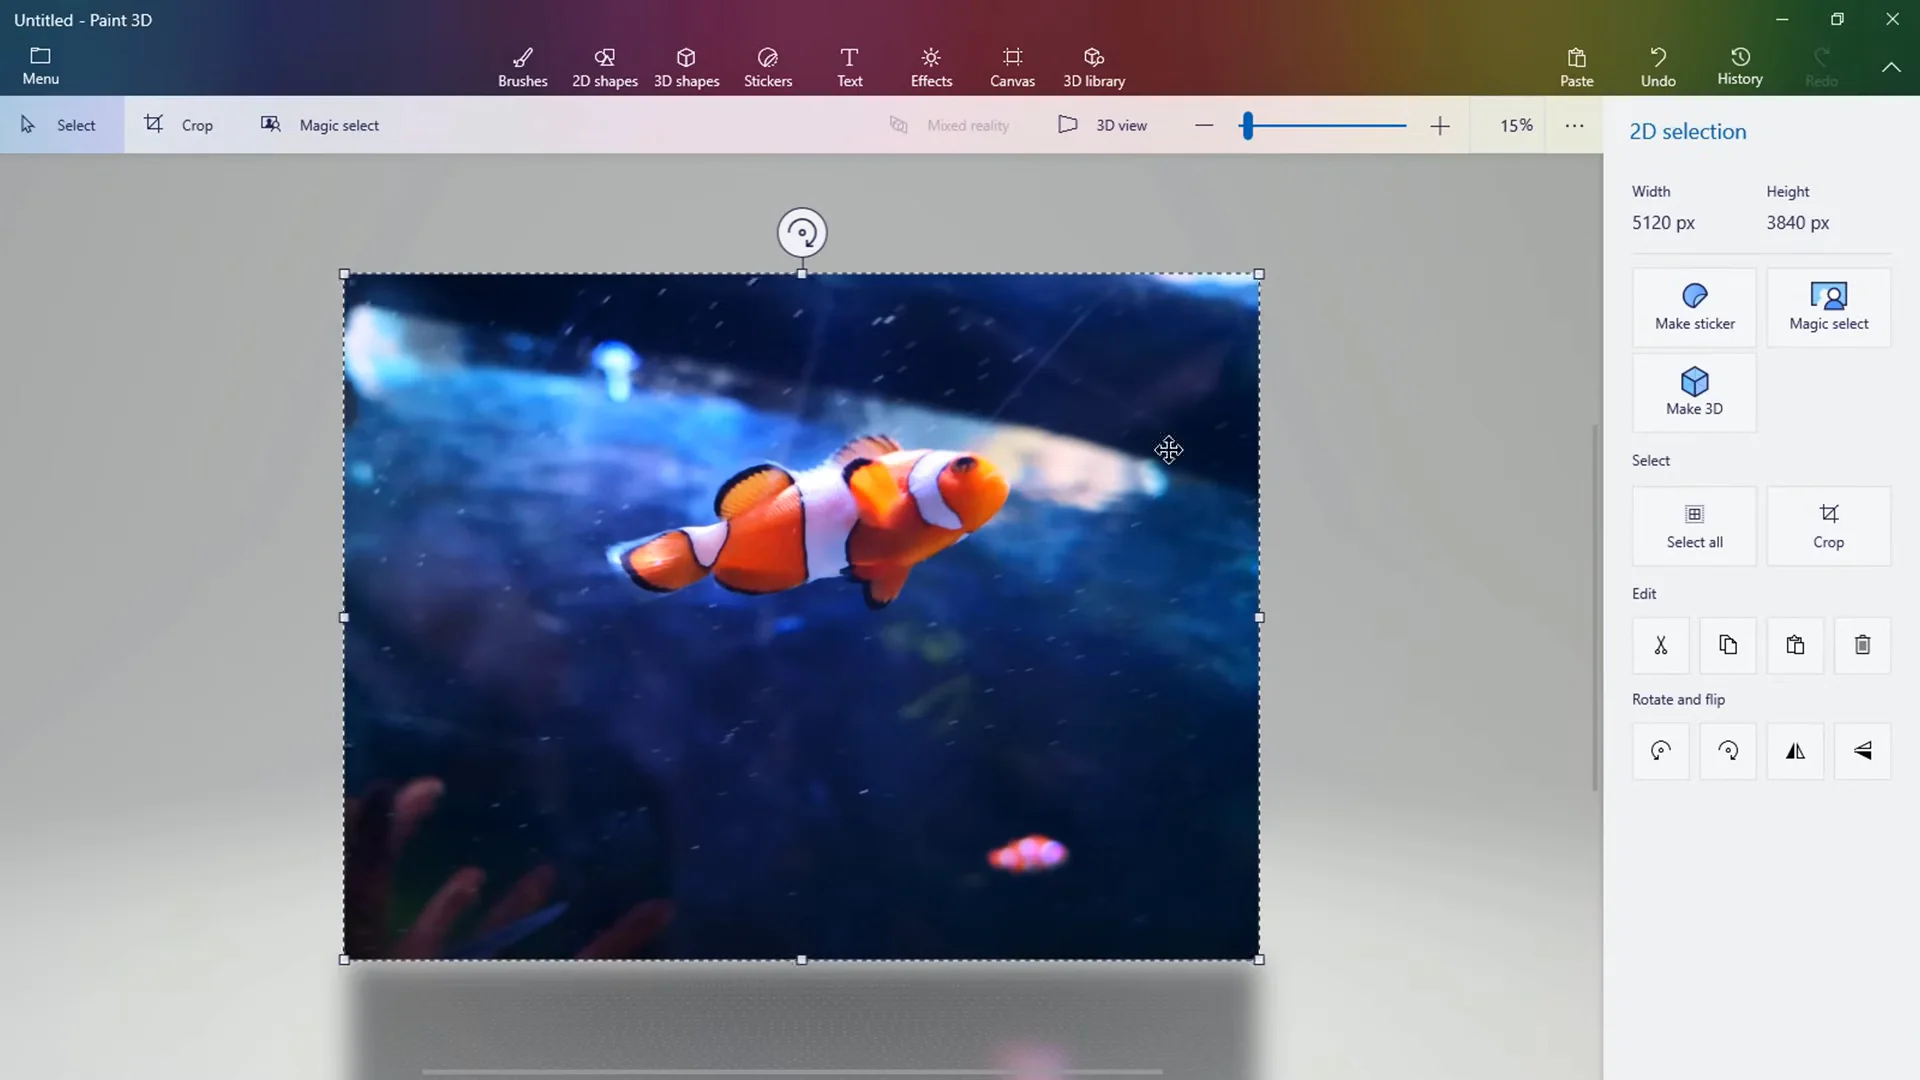
Figure 3: Resizing and rotating a picture. Drag the corners to scale, hold Shift to keep its shape, and use the top circular handle to spin it.
Cropping and sizing your canvas
When you open a new document, Paint 3D gives you a default canvas size. If your imported picture does not fill the white space, or if you want a specific shape like a square for an avatar, use the Crop tool:
-
1
Select the Crop Tool
Click the Crop tool in the upper-left toolbar (right next to Select).
-
2
Adjust Bounding Borders
A framing box with corner handles will appear around the canvas. Drag the borders inward to cut away the extra white space.
-
3
Set Aspect Ratio or Pixels
If you need a specific proportion, choose a preset ratio in the right sidebar (like 16:9 widescreen or 1:1 square), or type the exact width and height in pixels.
-
4
Confirm Your Crop
Press Enter or click Done on the right to apply the crop. As always, Ctrl+Z will undo it if you cropped too much.
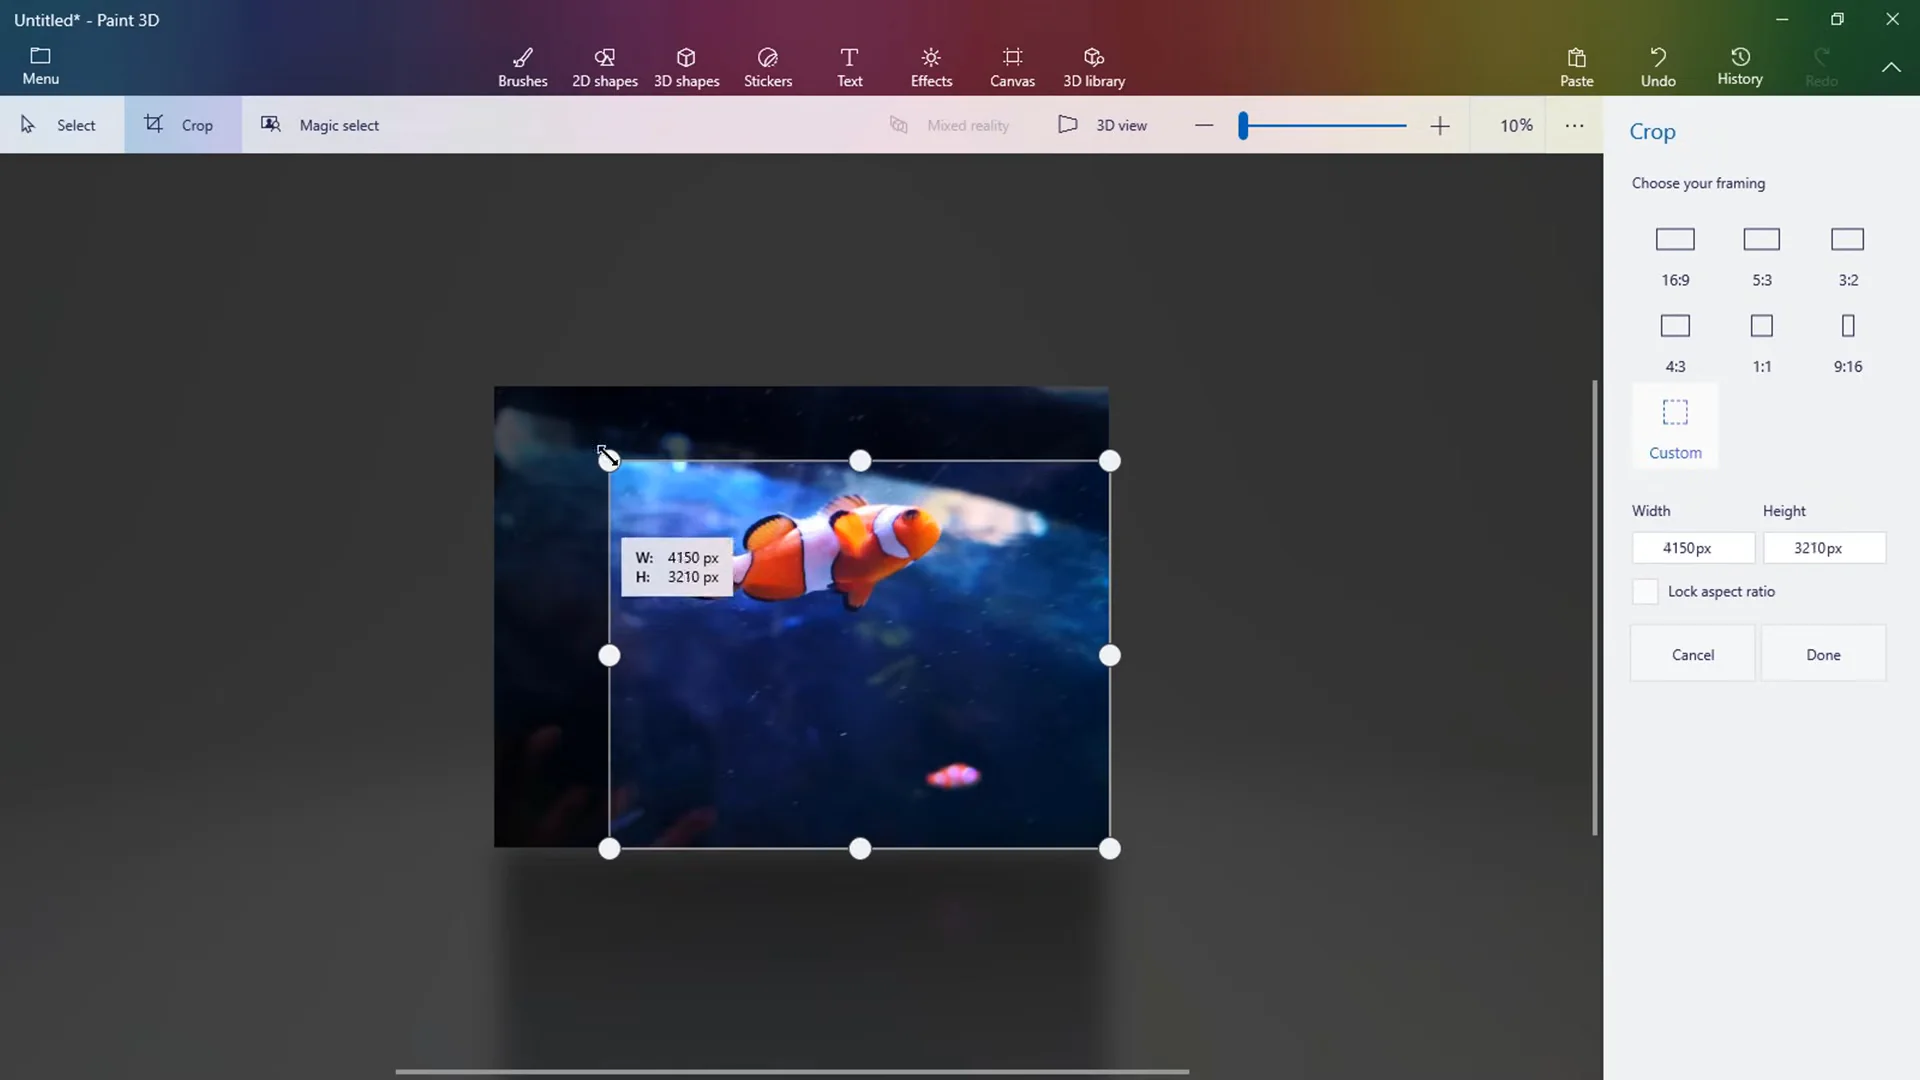
Figure 4: Trimming the canvas dimensions using the Crop bounding box and right sidebar aspect ratio controls.
Drawing with 2D brushes and shapes
If you want to sketch, paint, or add annotations, Paint 3D includes a versatile set of digital drawing tools across two main categories:
-
1
The 10 Brushes & How to Change Opacity in Paint 3D
Switch to the Brushes tab in the top ribbon. You will see 10 different media options: Marker, Calligraphy pen, Oil brush, Watercolor, Pixel pen, Pencil, Eraser, Crayon, Spray can, and the Fill bucket. On the right panel, you can adjust both Thickness and Opacity. Lowering the opacity below 100% creates translucent, layered strokes that work well for subtle shading, watercolor washes, or highlighter effects.
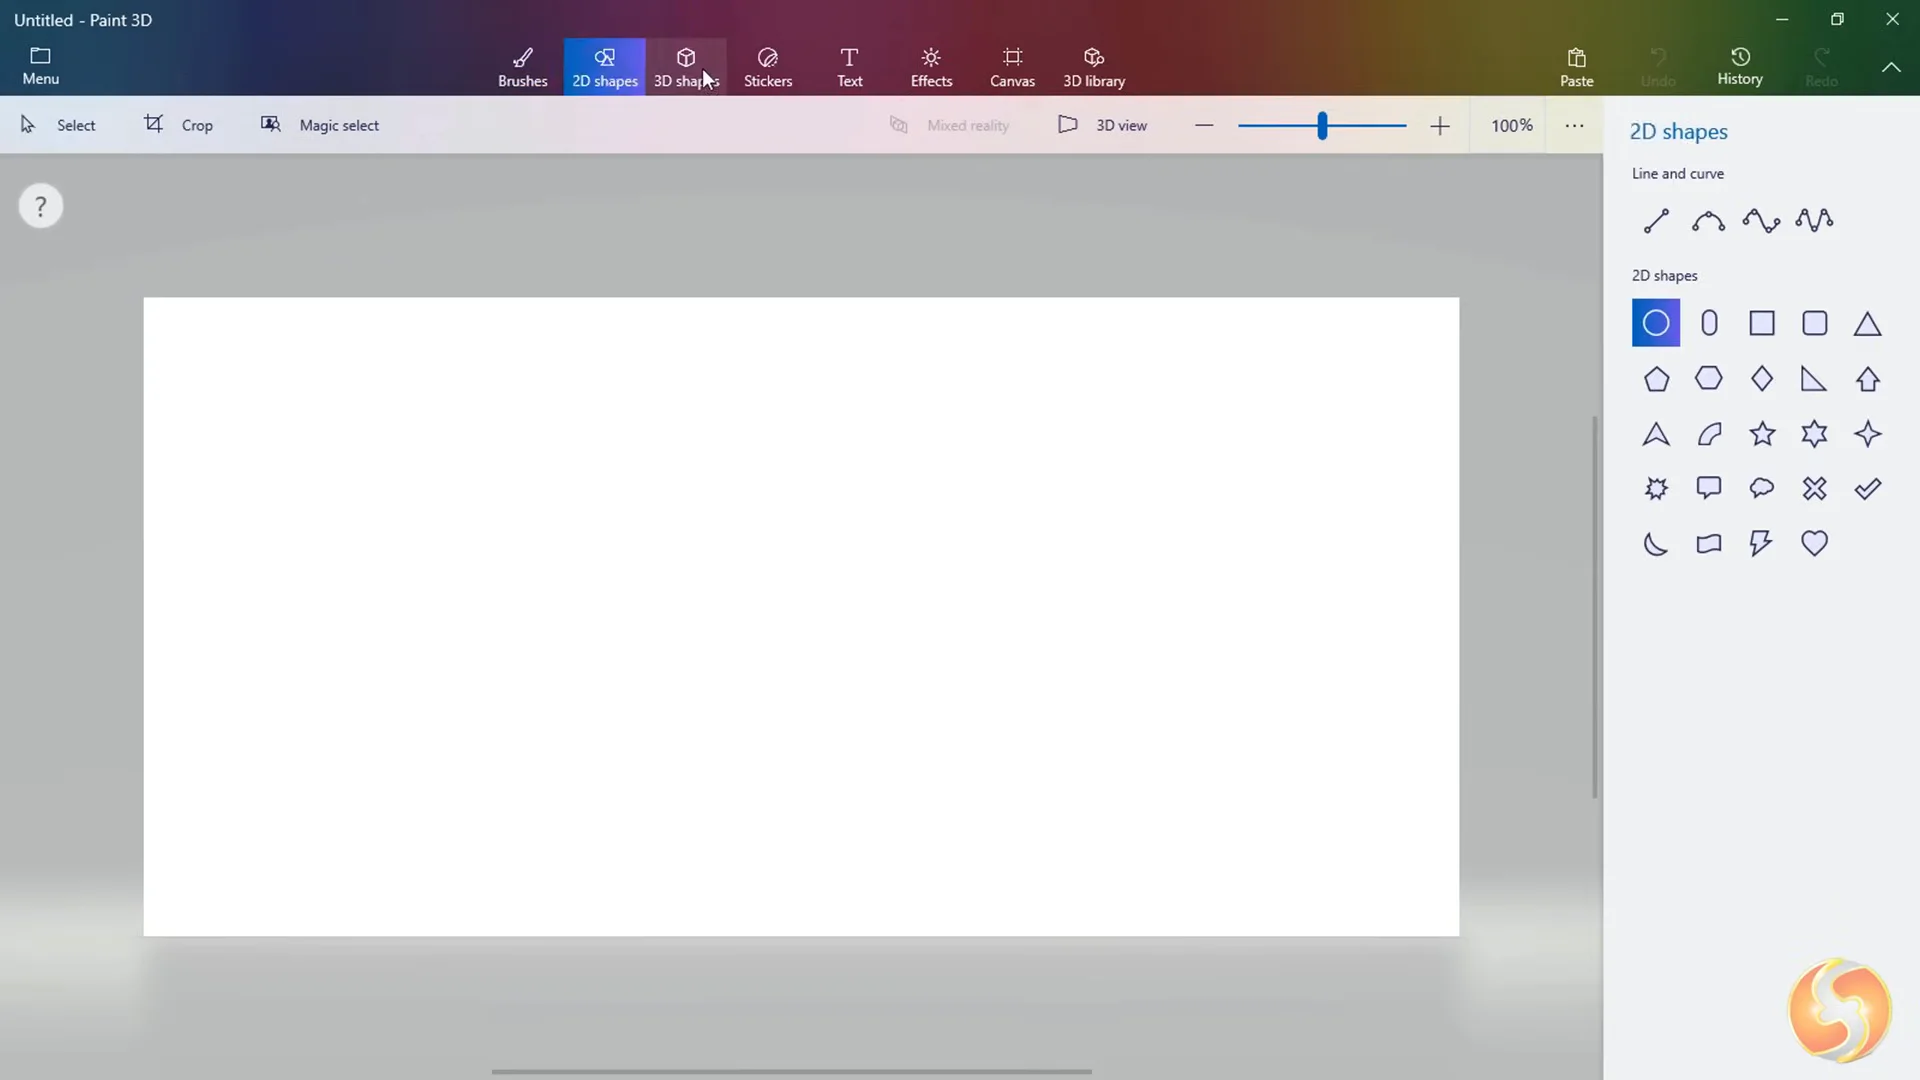
Figure 5: The Brushes panel lets you choose your medium, adjust stroke thickness, and slide opacity up or down. -
2
Lines, Curves, and 2D Shapes
Click the 2D shapes tab to insert straight lines, curved lines (with 3, 4, or 5 anchor points), circles, capsules, stars, and speech bubbles. When you place a curved line or polygon, small circular control dots appear along the shape. Drag these dots to bend curves or round the corners to your liking.
-
3
Stamping Duplicates
If you want to place several identical shapes without drawing each one from scratch, click the small Stamp icon on the shape's bounding box. It applies the current shape to the canvas and immediately creates an identical duplicate ready to position.
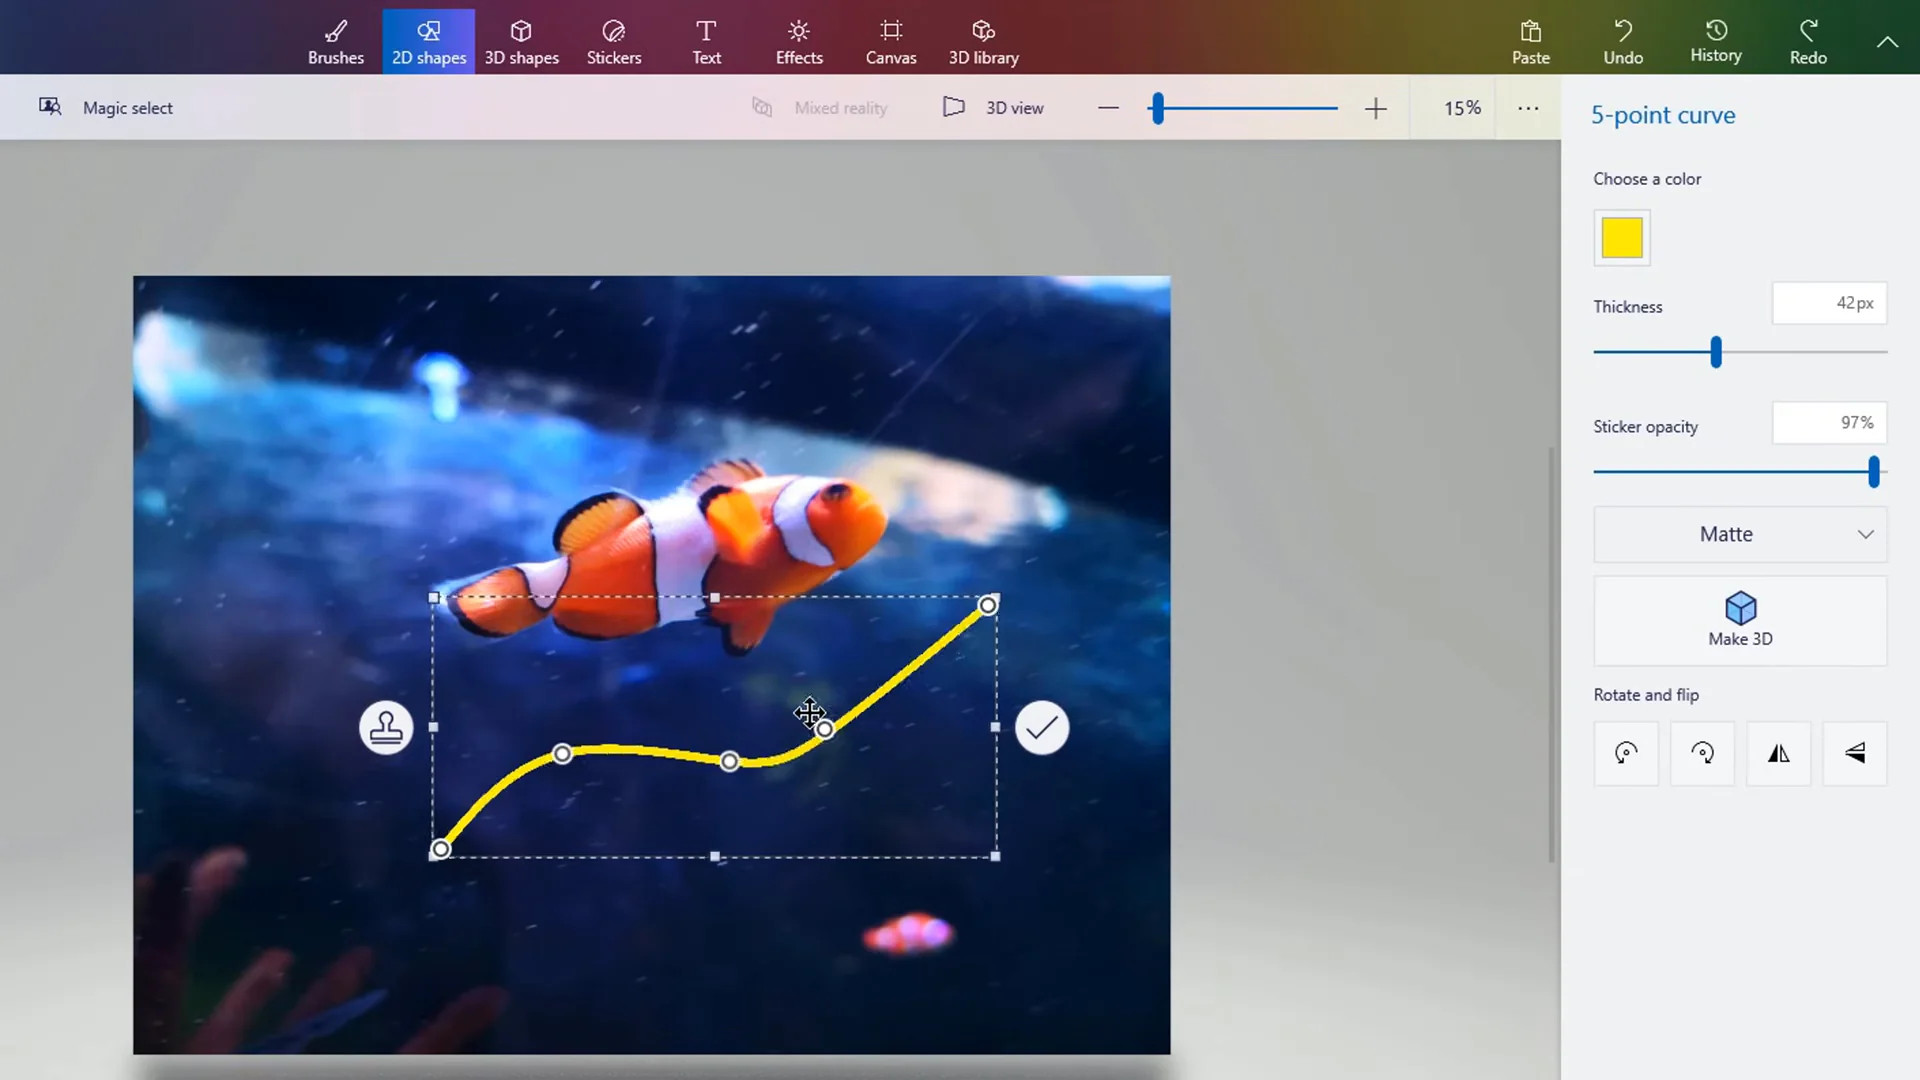
Figure 6: 2D shapes have small control dots so you can curve lines, round corners, or use the Stamp tool to place duplicates.
How to remove a background and turn 2D into 3D
By default, drawings on the canvas are flat. Paint 3D makes it easy to turn drawings into movable 3D objects, or isolate subjects from photos with Magic Select:
-
1
The "Make 3D" Button
Whenever you place a 2D shape, curve, or sticker, look at the right sidebar for the Make 3D button. Clicking this instantly gives your flat shape physical depth and lifts it off the canvas. Once it is 3D, it won't bake into the background, so you can move, spin, or scale it whenever you want. You can also click Make sticker to save your custom drawing into your sticker drawer for later use.
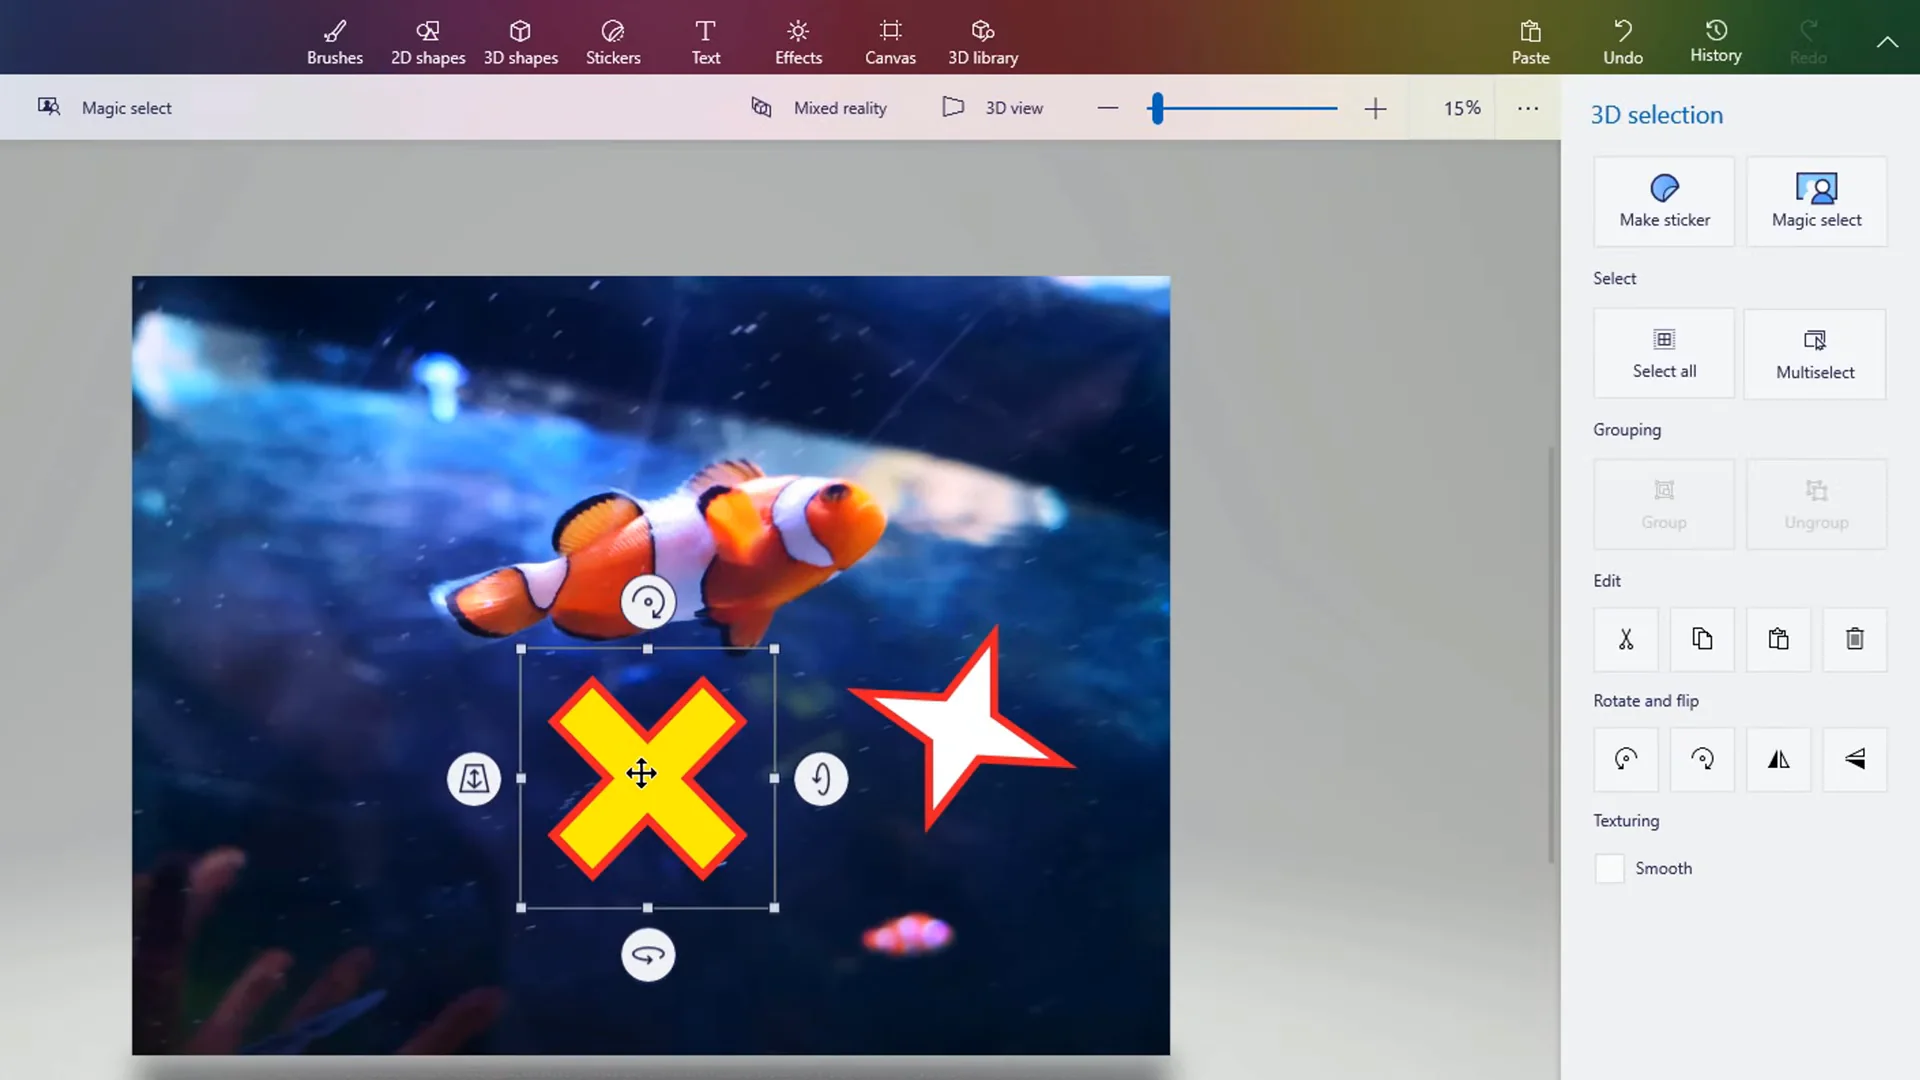
Figure 7: Clicking "Make 3D" in the right panel turns flat drawings or stickers into independent, movable 3D objects. -
2
How to Remove Background in Paint 3D with Magic Select
Magic Select works best when your subject stands out reasonably well from its background. Select your photo on the canvas and click Magic select in the top toolbar. Drag the corner handles of the blue framing box snugly around the person, pet, or object you want to cut out, then click Next on the right.
Paint 3D will highlight what it detected. If an edge was missed, click Add and draw a quick line over the part to include. If it grabbed too much background, click Remove and trace over the unwanted area.
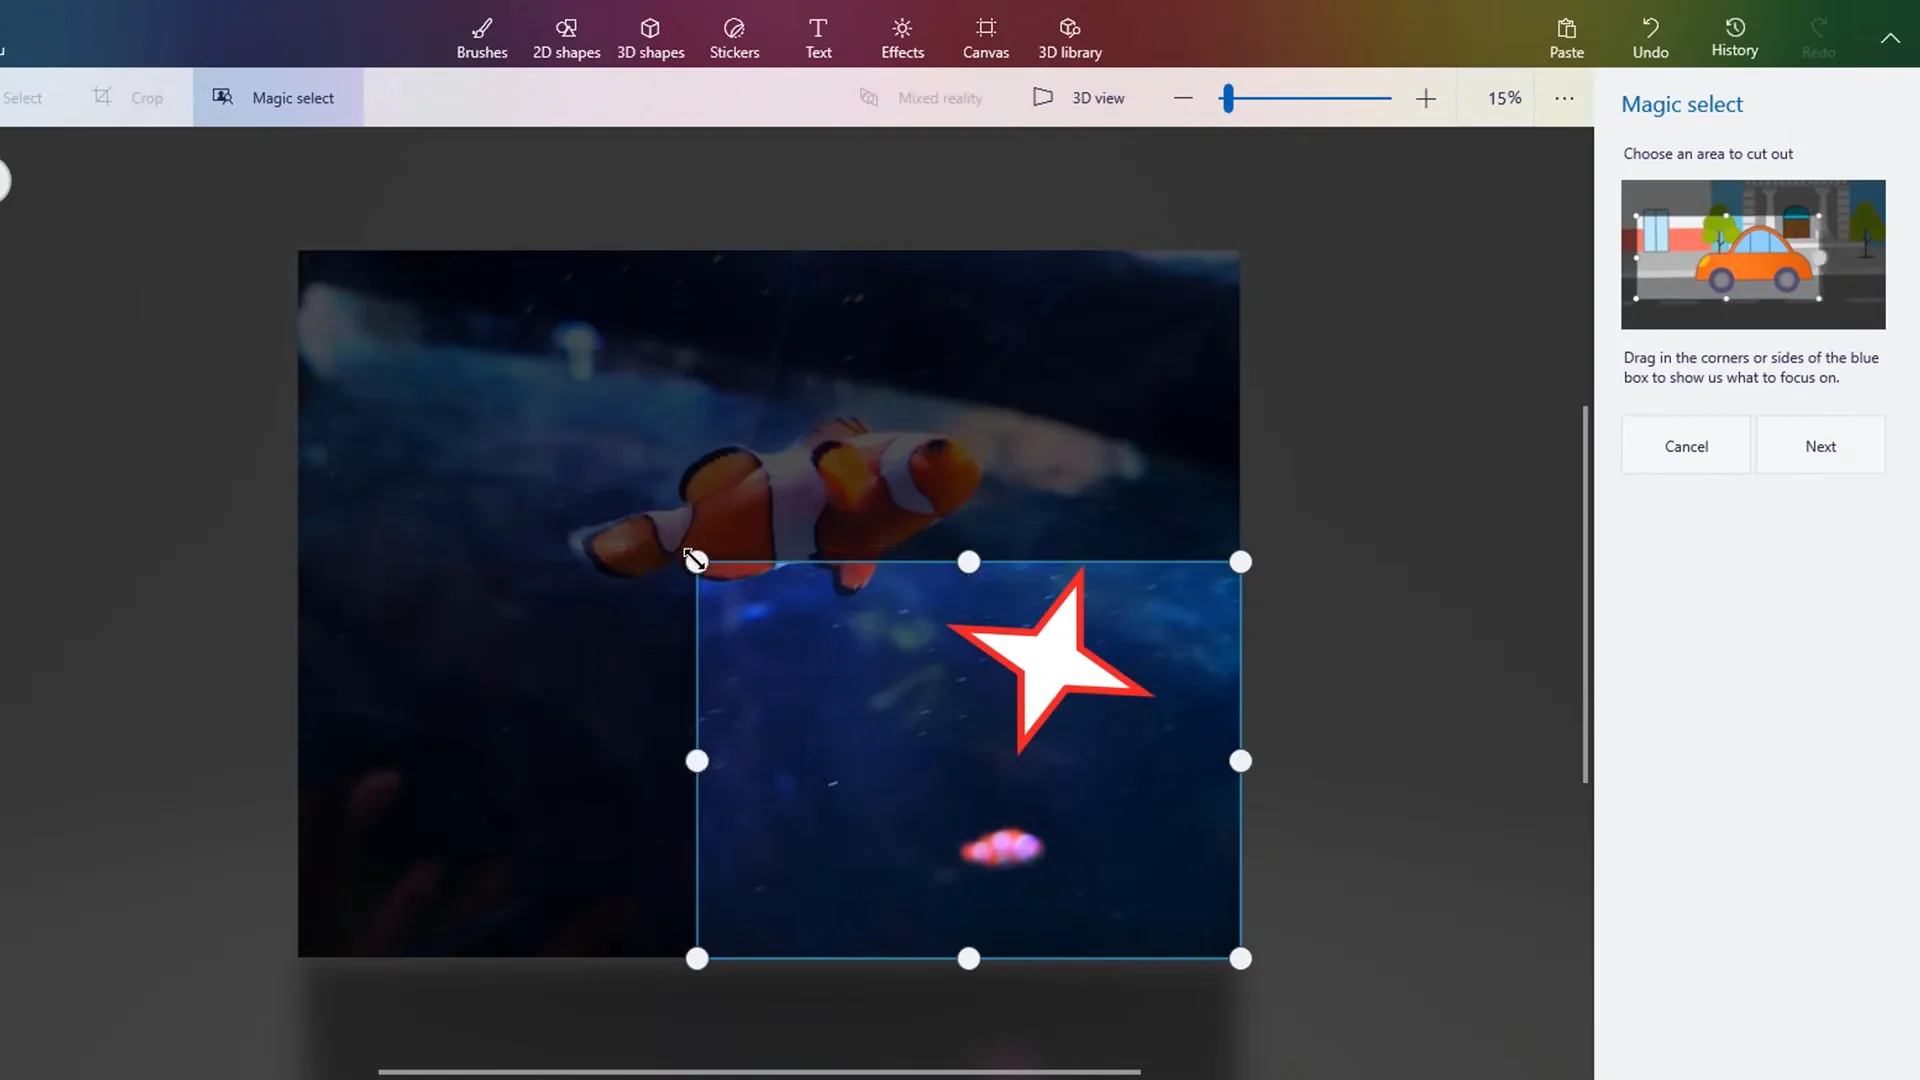
Figure 8: Magic Select highlights your subject automatically. Use the Add and Remove pens on the right to clean up the edges. -
3
Working with Your Cutout
Click Done. Your subject is now a separate floating cutout. Paint 3D automatically fills in the background canvas behind it so there isn't an awkward hole. You can drag your cutout to another part of the canvas, copy it into another project, or delete the old background entirely.
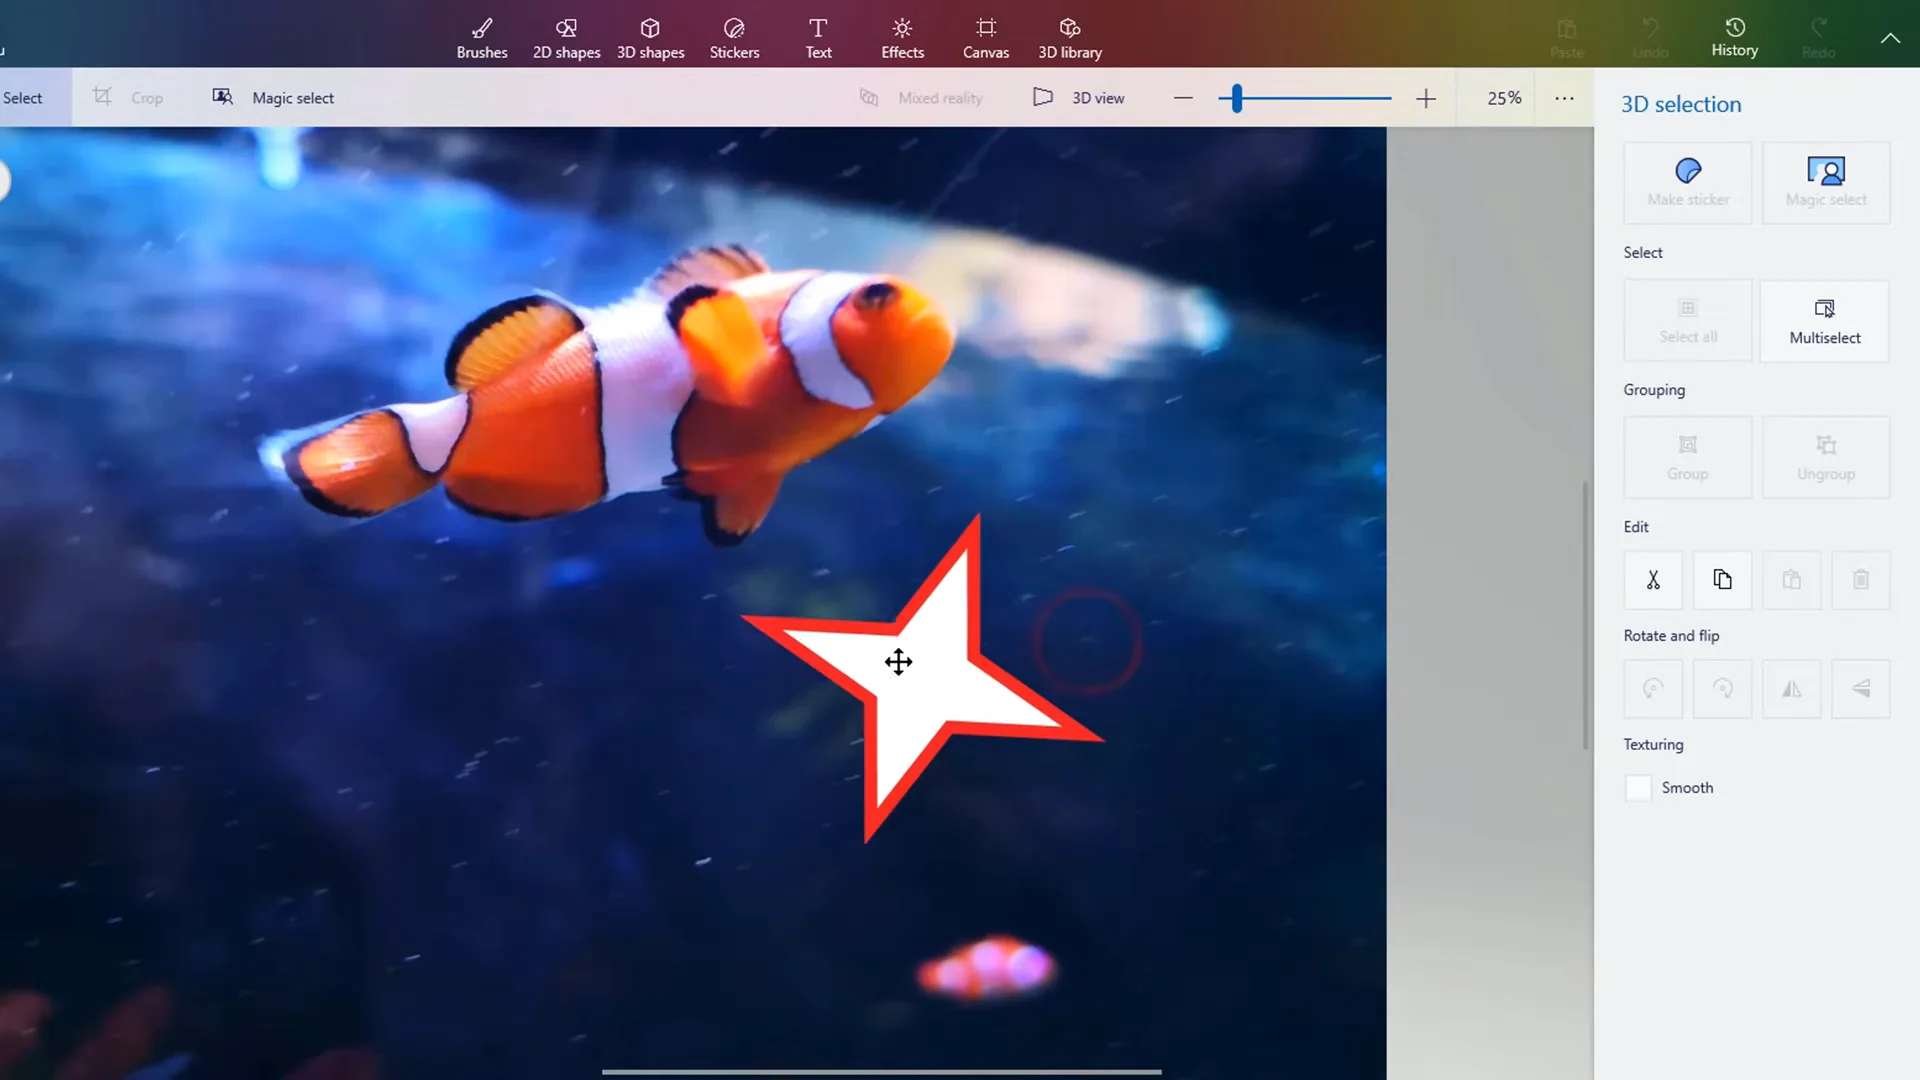
Figure 9: Once extracted, you can pull your subject away from the canvas while Paint 3D fills in the background behind it.
How to move, rotate, and layer 3D objects
When you add a 3D model (either from the 3D shapes tab or the built-in 3D library), it floats freely in 3D space rather than sticking to the canvas.
-
1
Using the 3D Library
In supported versions of Windows with an active connection, you can click the 3D library tab to search thousands of free models (such as vehicles, animals, characters, and furniture) and insert them directly into your scene. If the library button shows a network connection error, see our troubleshooting guide for why the online service was retired and how to add 3D models to your scene.
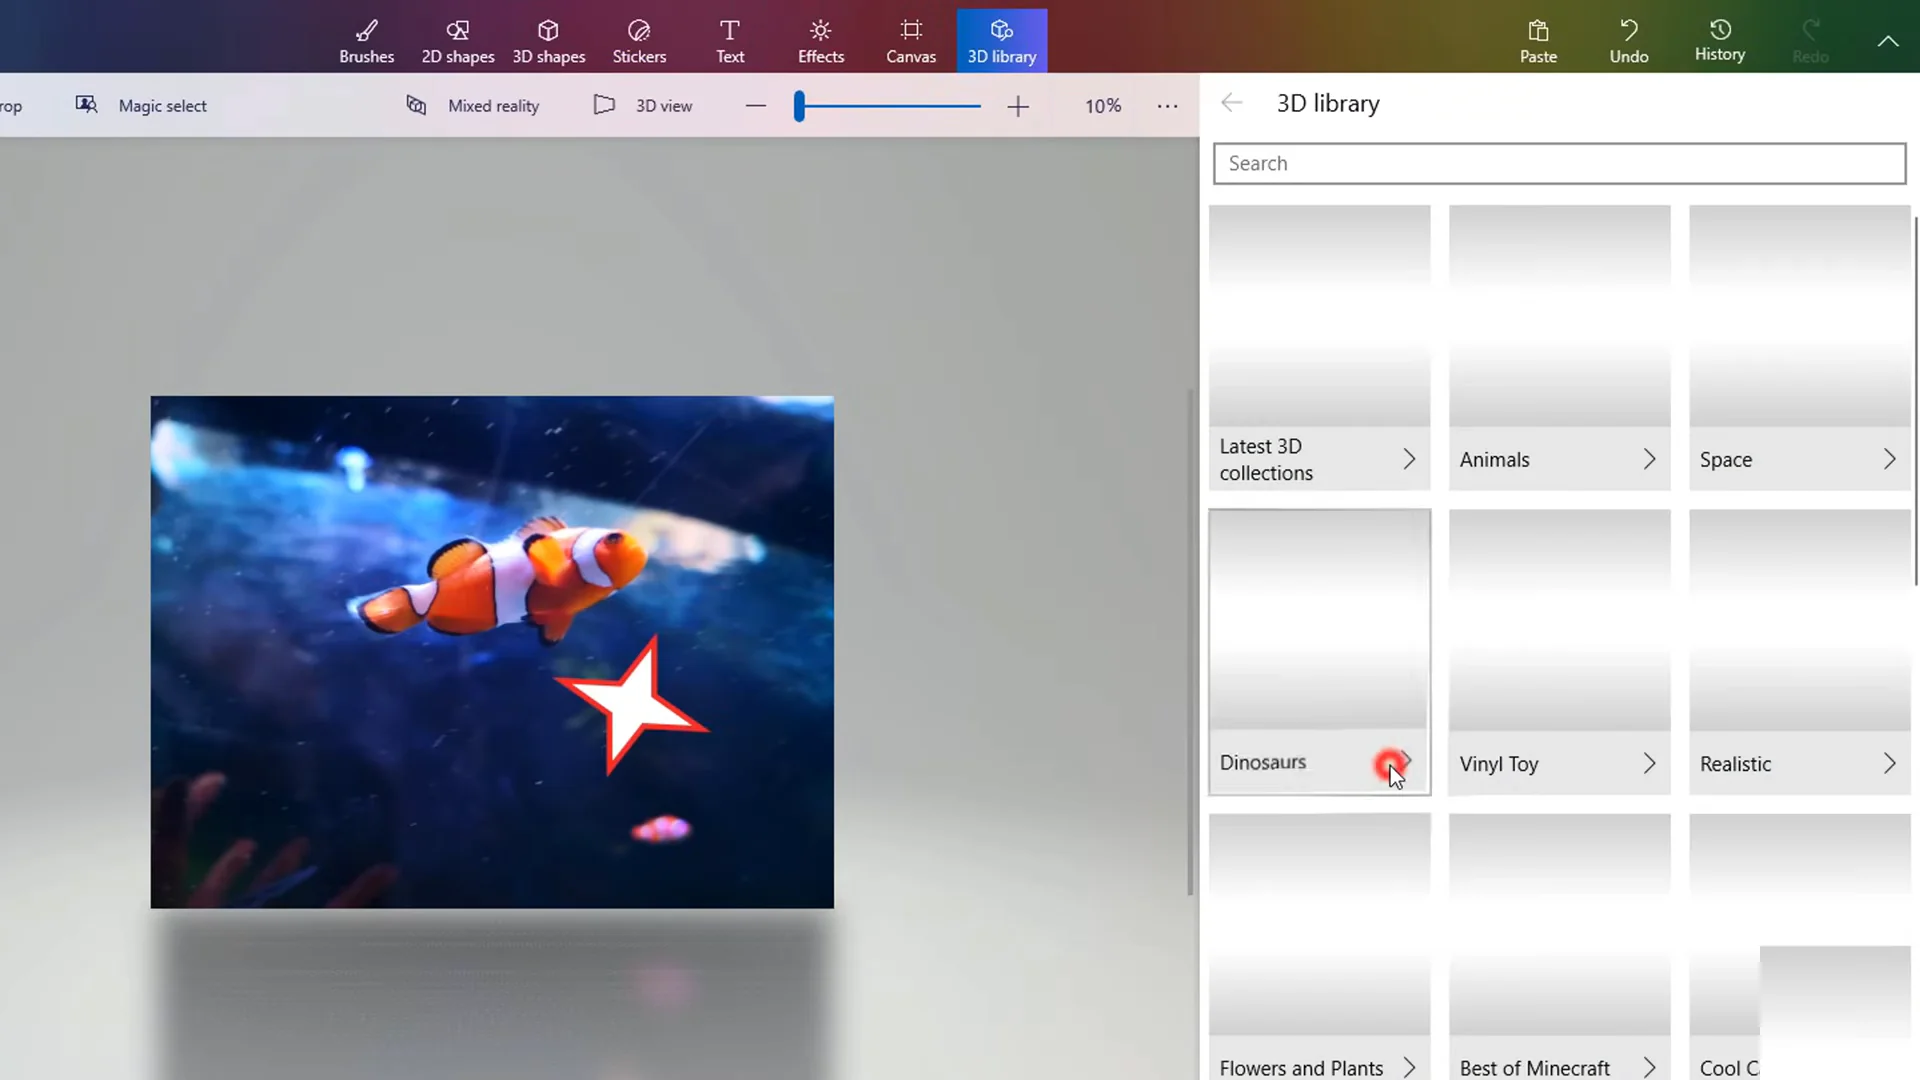
Figure 10: The 3D Library lets you search and insert ready-made 3D models directly into your scene. -
2
The 3D Control Handles Explained
Whenever you click on any 3D model, Paint 3D places five control handles around it:
- Corner handles: Click and drag any white corner handle to scale the model larger or smaller.
- Bottom ring (Tilt): Tilts the model forward toward you or backward away from you.
- Right ring (Turn): Spins the model horizontally to face left or right.
- Top ring (Roll): Rotates the model clockwise or counter-clockwise on the screen.
- Left slider (Depth handle): This is the depth control. Drag it up or down to push the object farther back (even behind the canvas) or pull it forward toward you.
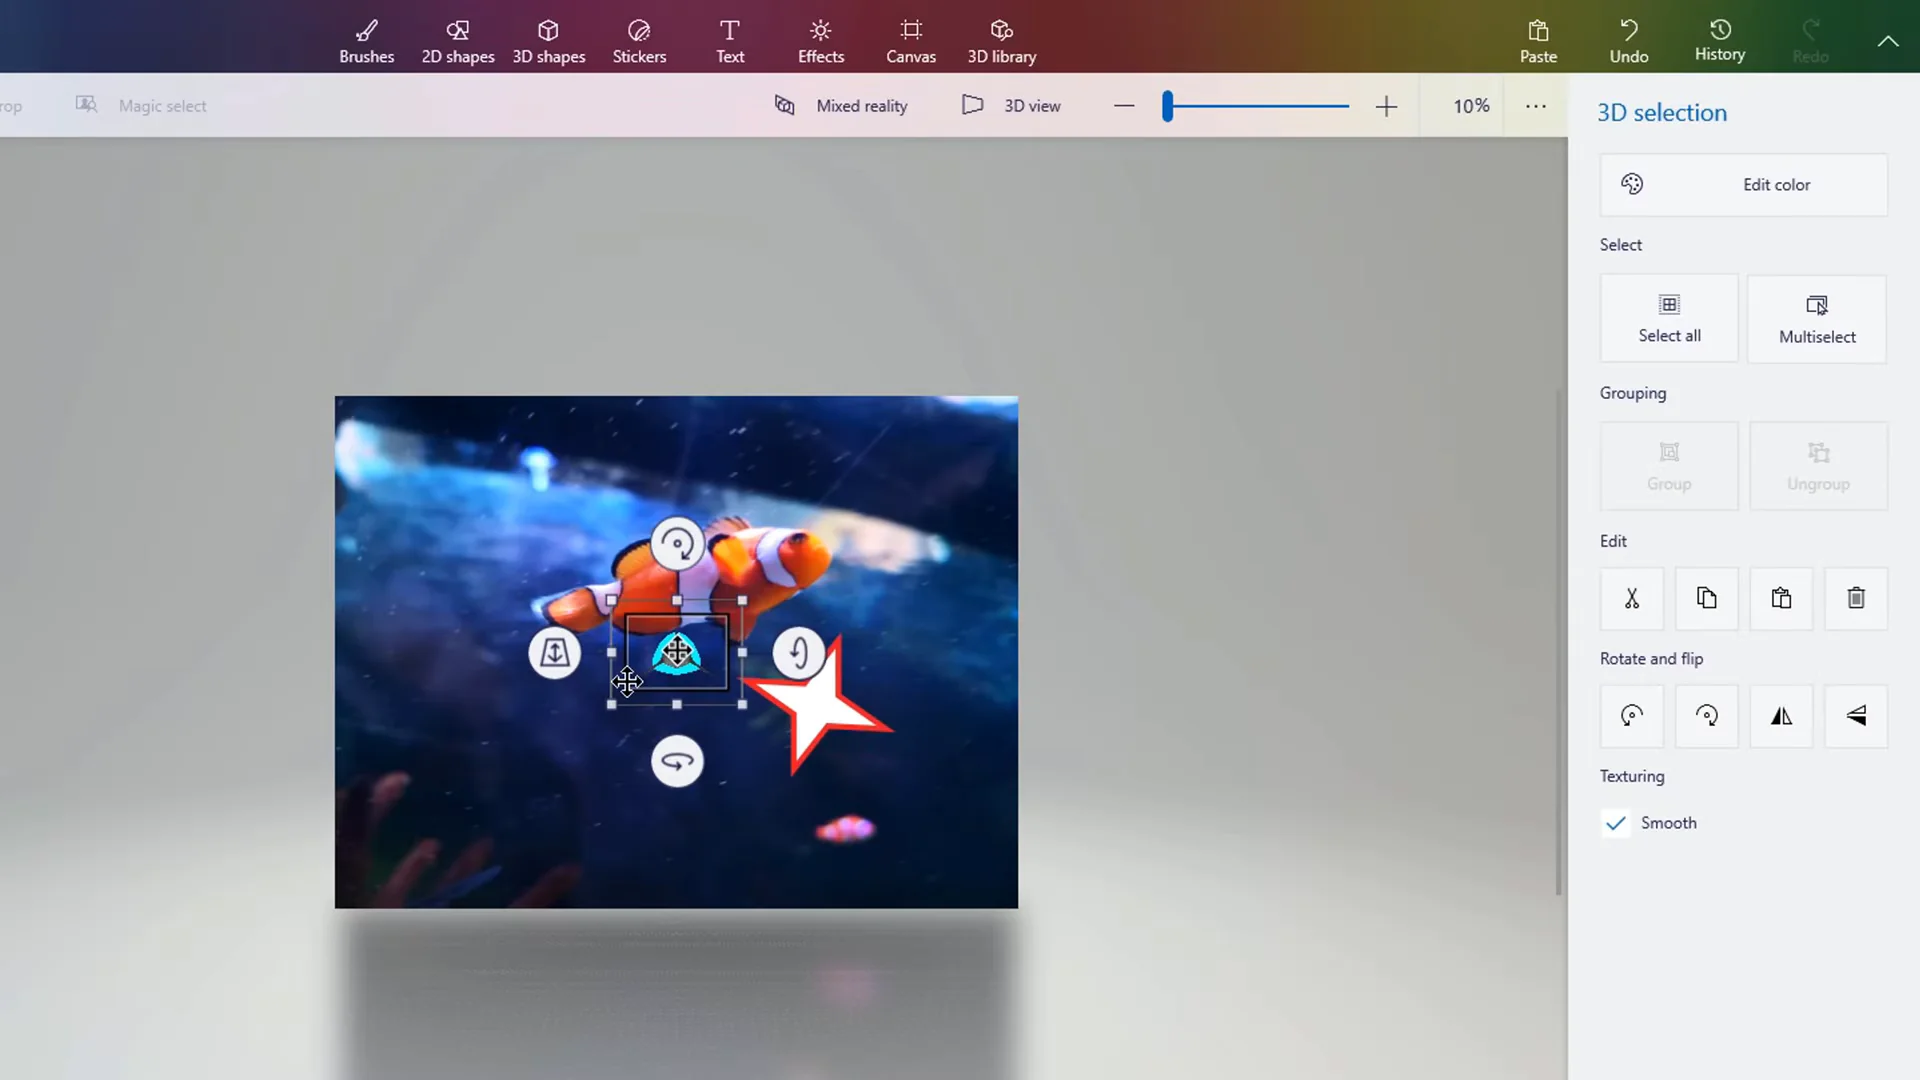
Figure 11: The 3D controls let you resize, rotate across three axes, and use the left handle to move the model forward or backward in depth.
Looking around your scene in 3D View
When placing 3D objects from the front, it is easy to think two shapes are touching when one is actually floating feet behind the other. That is where 3D View comes in:
-
1
Turn on 3D View
Click the 3D view button in the top toolbar (right next to the zoom slider). Your canvas will tilt in perspective so you can see the real depth of your scene.
-
2
Look Around (Orbit)
Hold down your Right Mouse Button and drag across the screen. This rotates your viewpoint around your models so you can inspect them from the side, top, or back.
-
3
Slide Your View (Pan)
Hold down the Alt key and drag with your left mouse button (or click and drag with your middle mouse wheel) to slide the camera sideways or up and down. Click the 3D view button again at any time to snap back to your flat workspace.
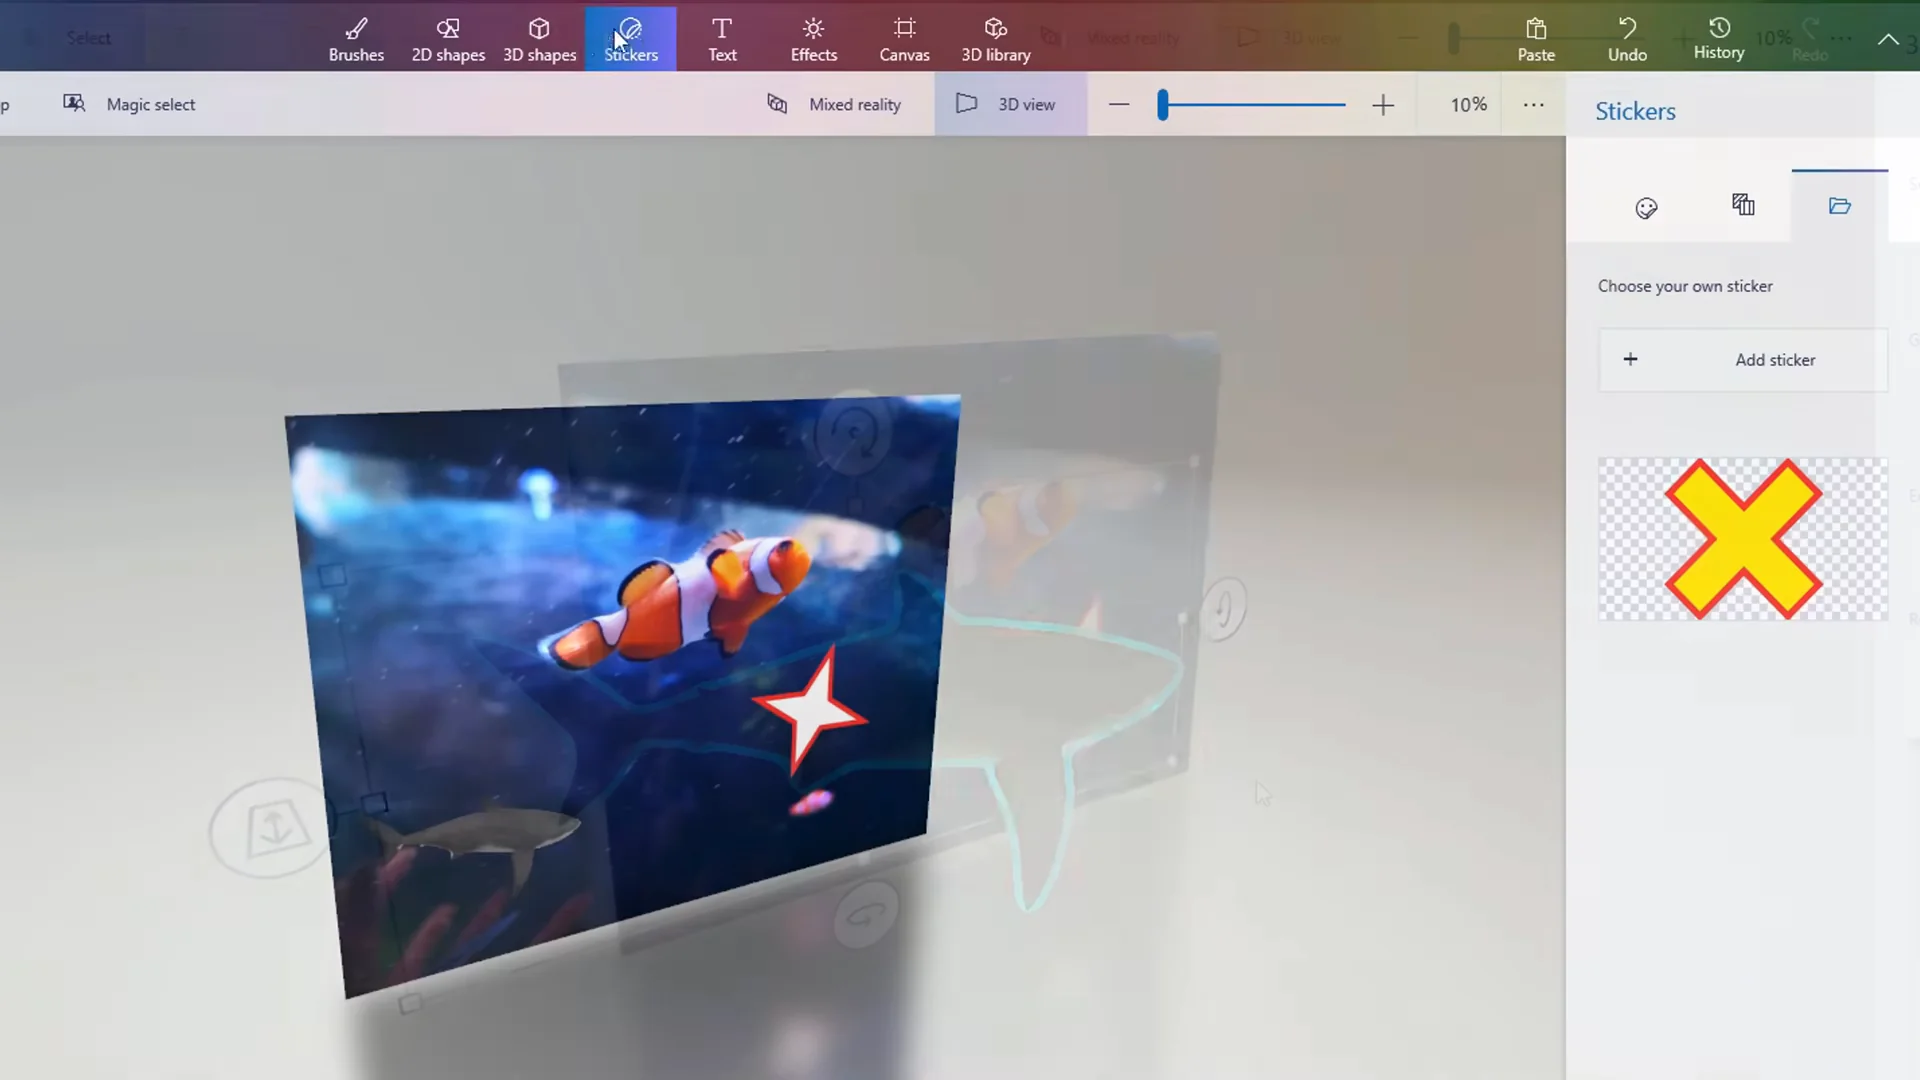
Figure 12: Switch to 3D View to inspect your models from any angle using right-click drag to rotate and Alt + drag to slide the camera.
Drawing your own 3D doodles and tubes
You aren't limited to ready-made cubes and spheres. Under 3D shapes > 3D doodle, Paint 3D provides three freehand tools to create custom 3D objects from scratch:
-
1
The 3D Tube Brush
Think of this like squeezing toothpaste or bending a wire. Click and drag to draw lines, pipes, vines, or handles. You can choose different tube shapes in the right sidebar (circular, faceted, or diamond). After drawing, little adjustment dots appear along the line so you can bend and reshape the curve before finishing.
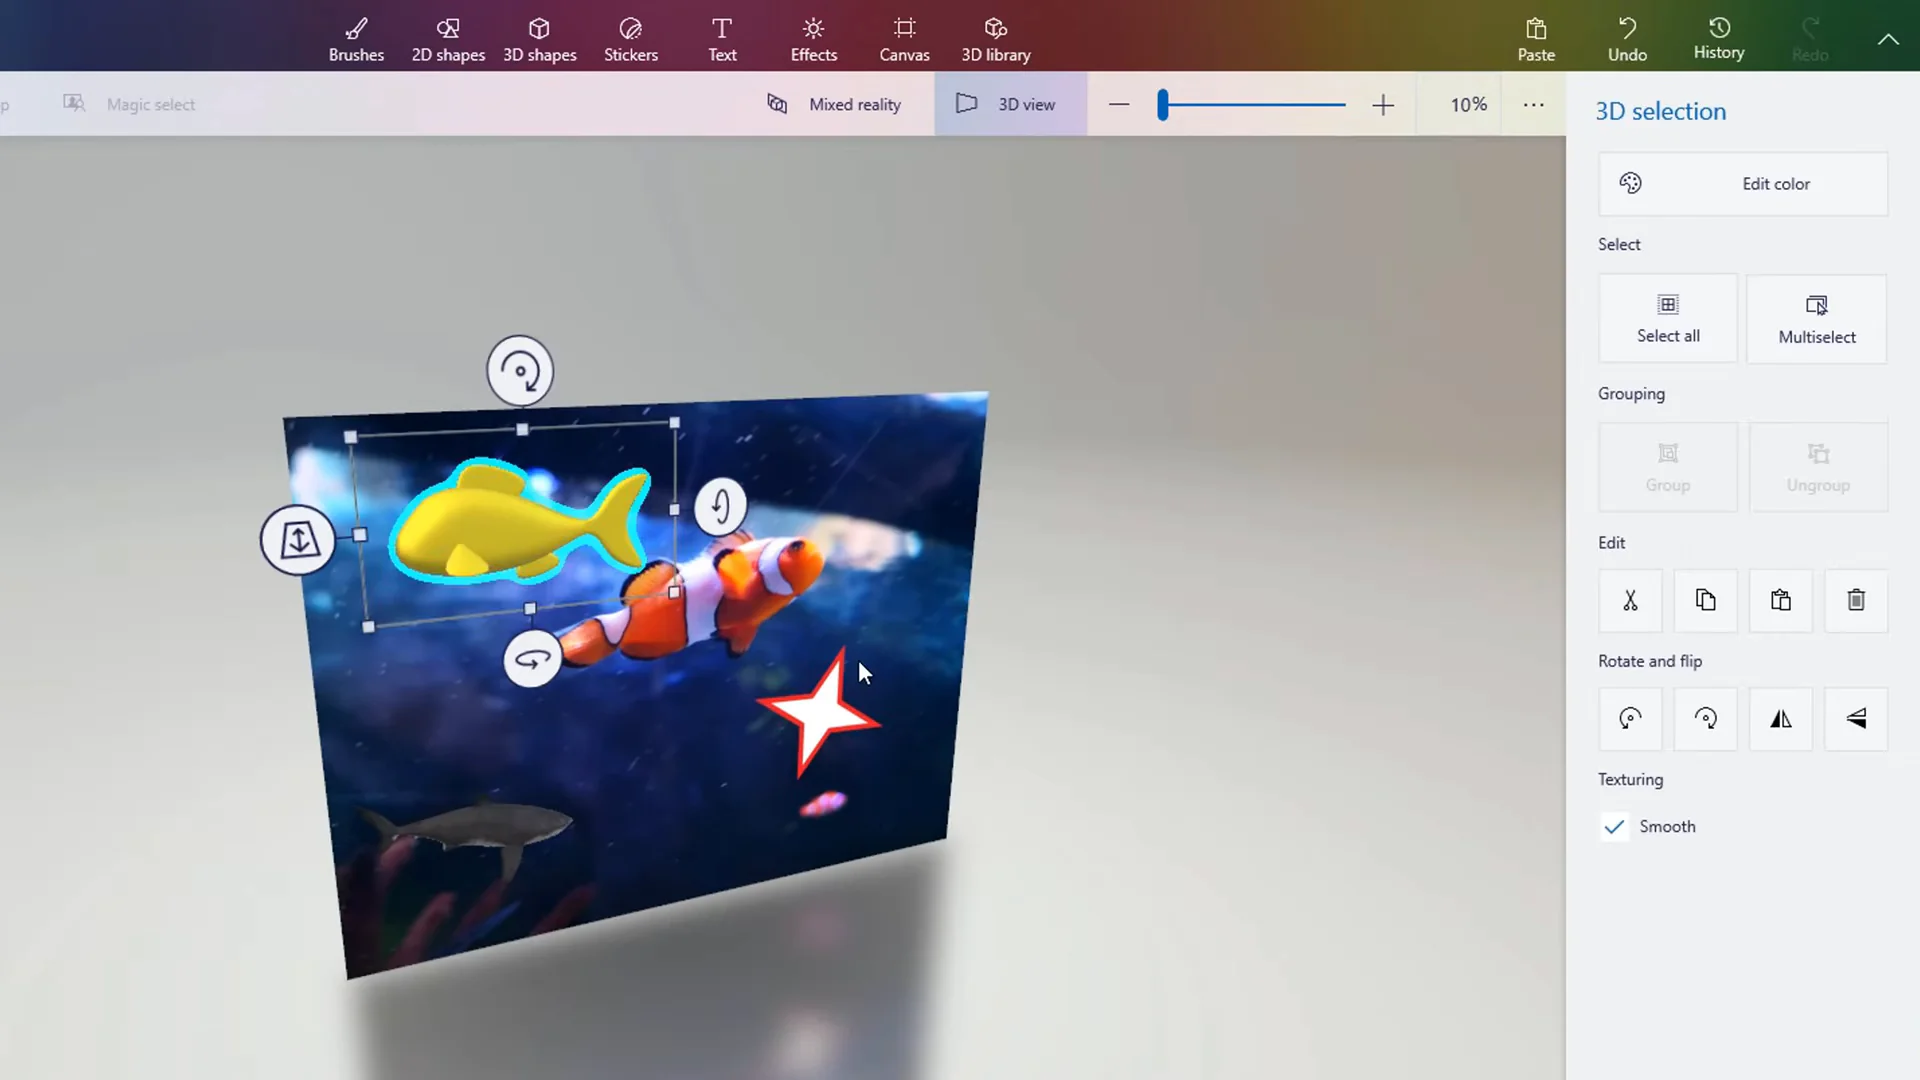
Figure 13: The 3D Tube Brush lets you draw custom pipes, vines, and curves with adjustable anchor points. -
2
Soft Edge Doodle
Draw a closed loop, like a cloud, pillow, or body part. The moment you bring your line back to the starting point and close the shape, Paint 3D automatically puffs the sketch into a smooth, rounded 3D cushion.
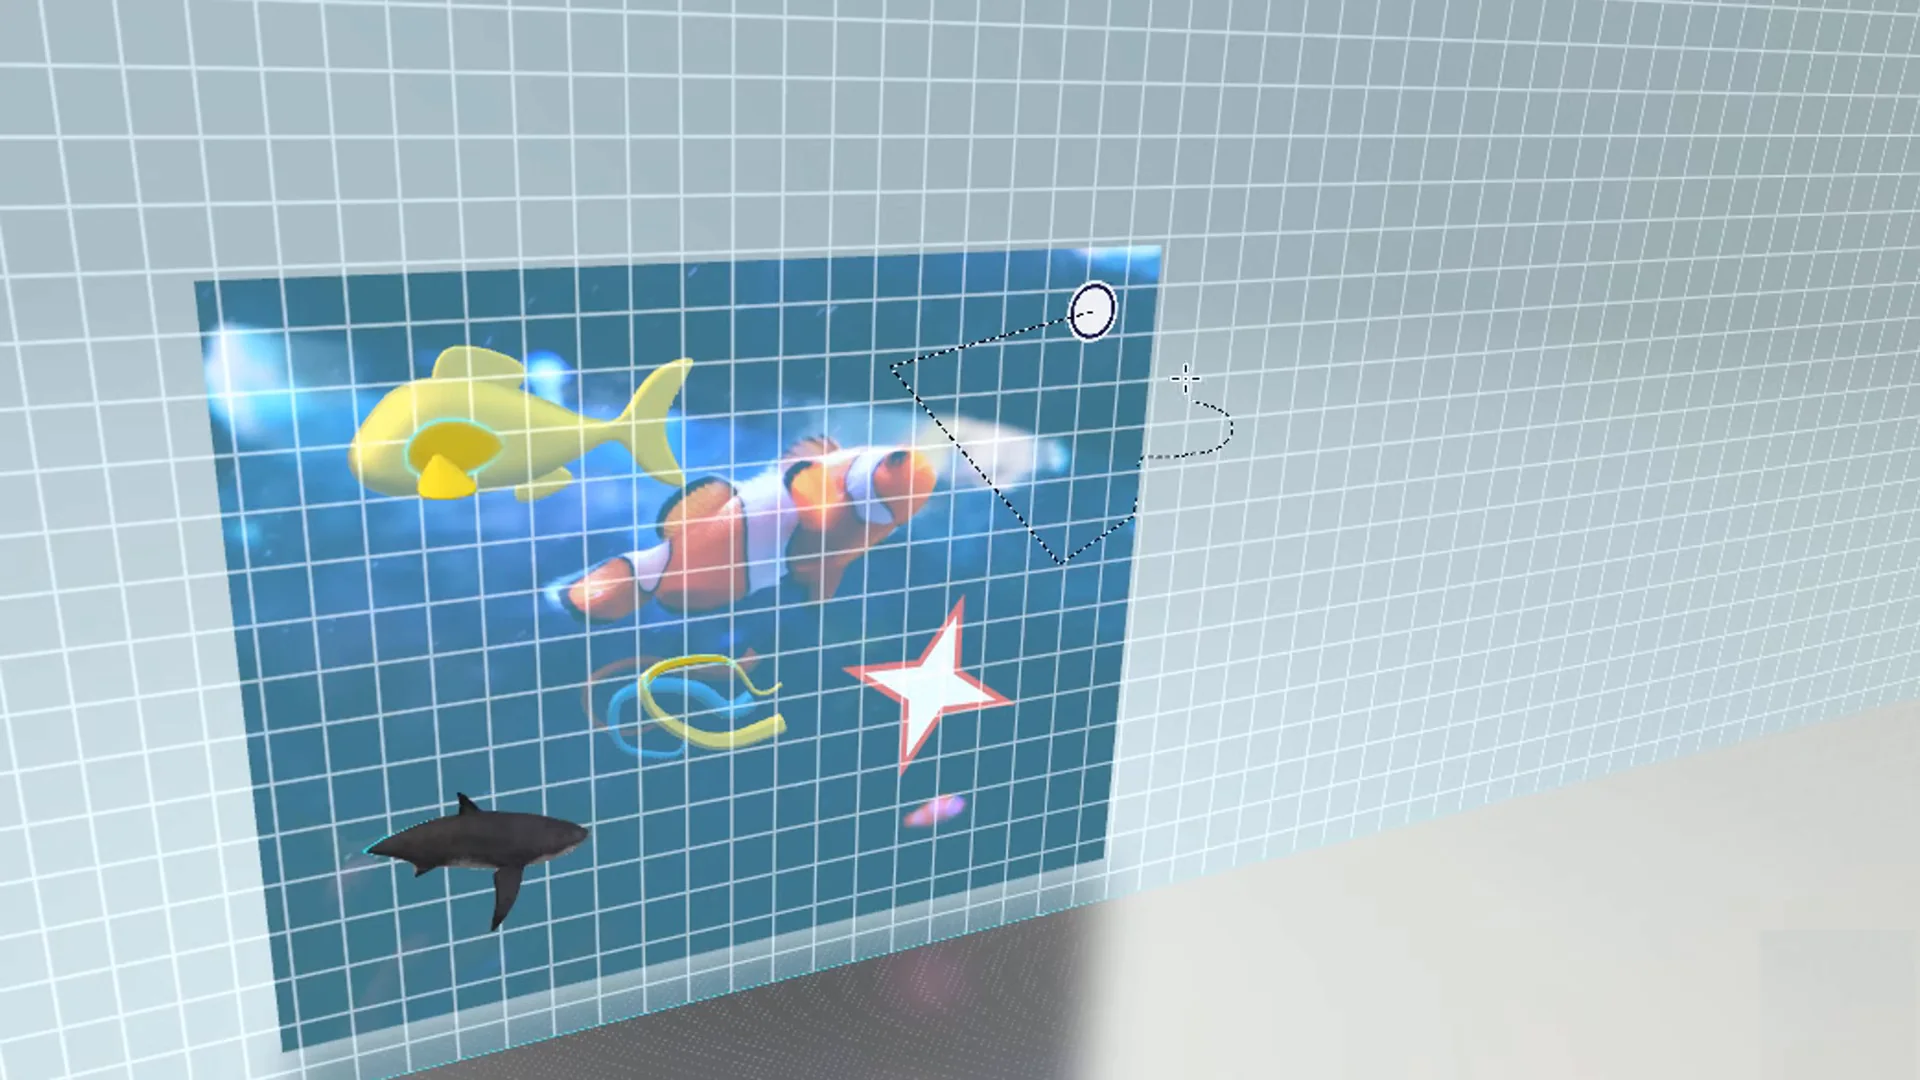
Figure 14: The Soft Edge doodle automatically turns your drawn outline into an inflated, rounded 3D shape. -
3
Sharp Edge Doodle
Instead of a continuous smooth curve, click point-by-point to outline straight geometric sides. When you connect back to your starting point, Paint 3D extrudes the outline into a crisp, flat-faced 3D block with sharp edges.
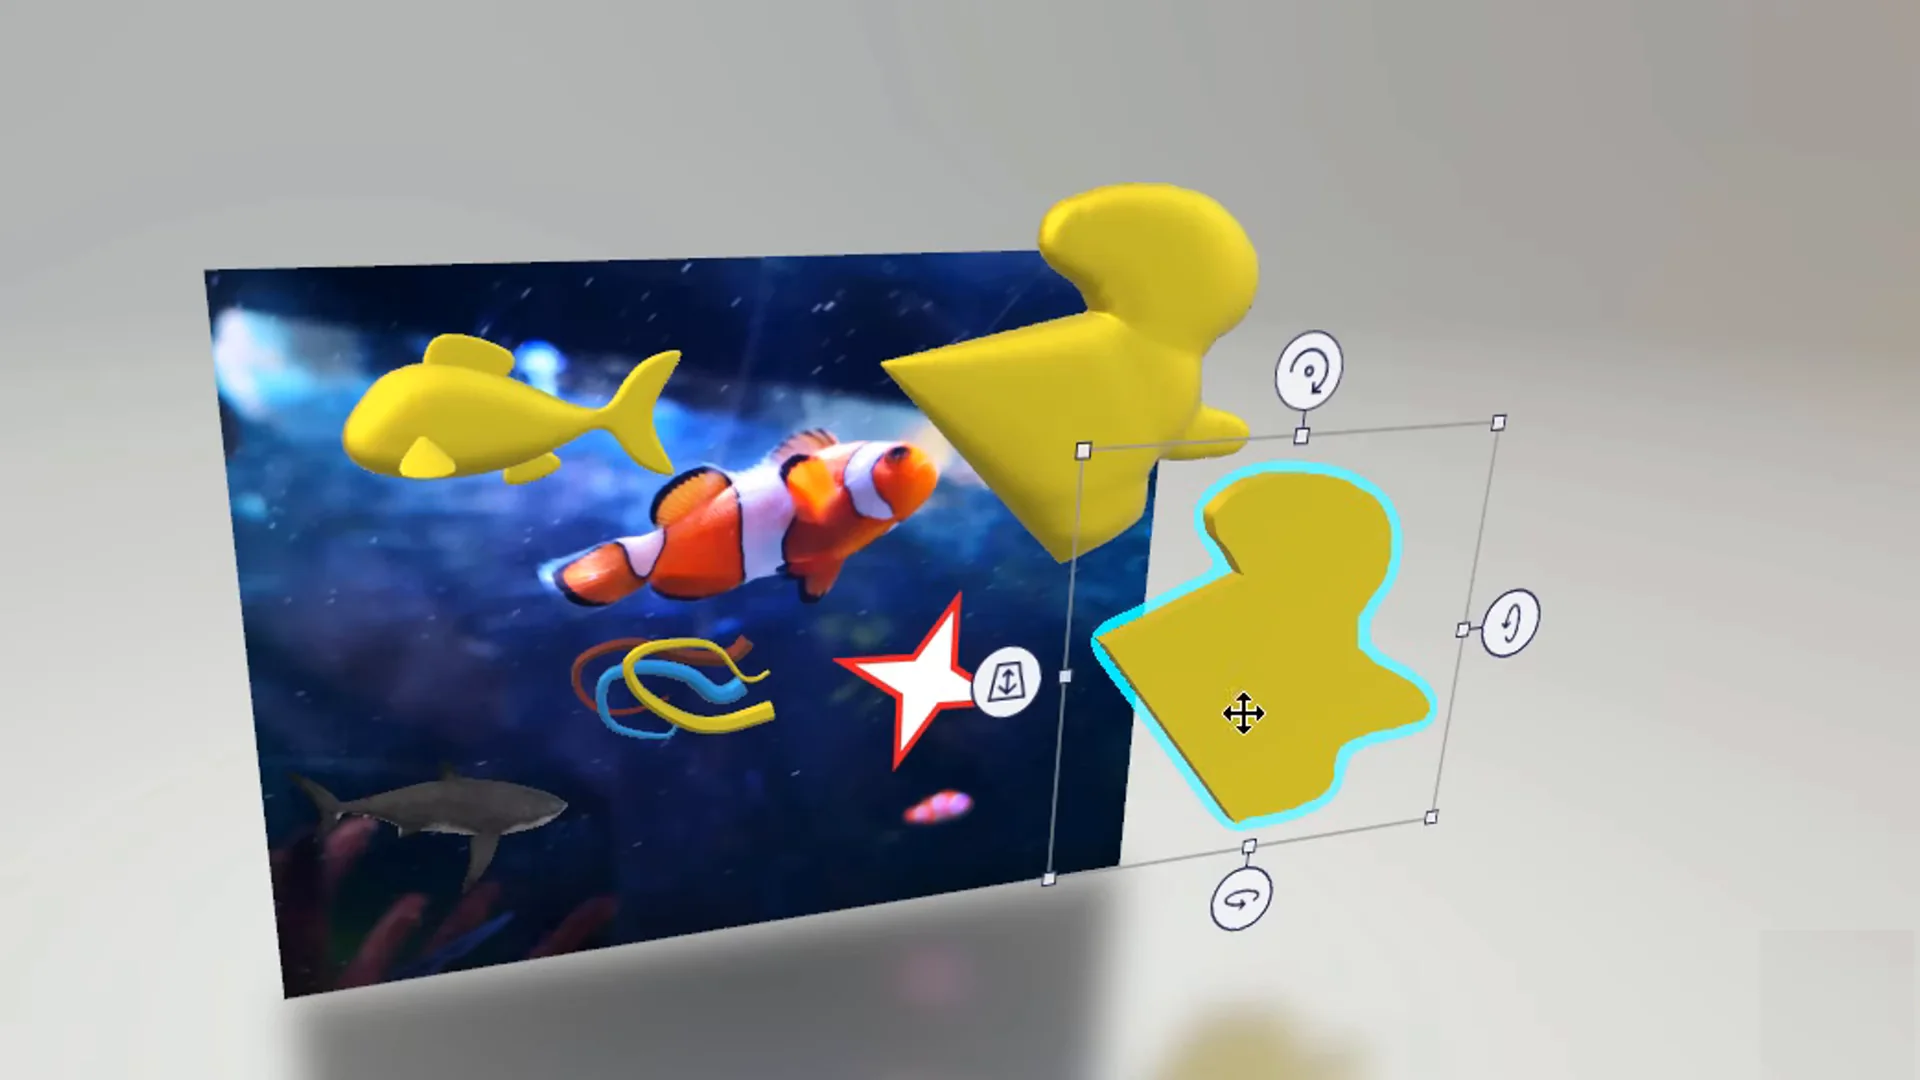
Figure 15: The Sharp Edge doodle lets you click point-by-point to create flat-sided 3D shapes with crisp edges.
Choosing materials and painting on 3D models
Once you have a 3D model in your scene, you can customize how shiny it looks and even paint directly onto its surface:
-
1
Surface Finishes
Select any 3D model and look at the right sidebar. Under the color palette, the material dropdown gives you four surface finishes:
- Matte: A flat, non-reflective finish like clay or paper.
- Gloss: A smooth, shiny finish with clear highlights, like smooth plastic.
- Dull Metal: A soft, brushed metallic look like pewter or brushed aluminum.
- Polished Metal: A bright, mirror-like chrome finish that reflects scene lighting strongly.
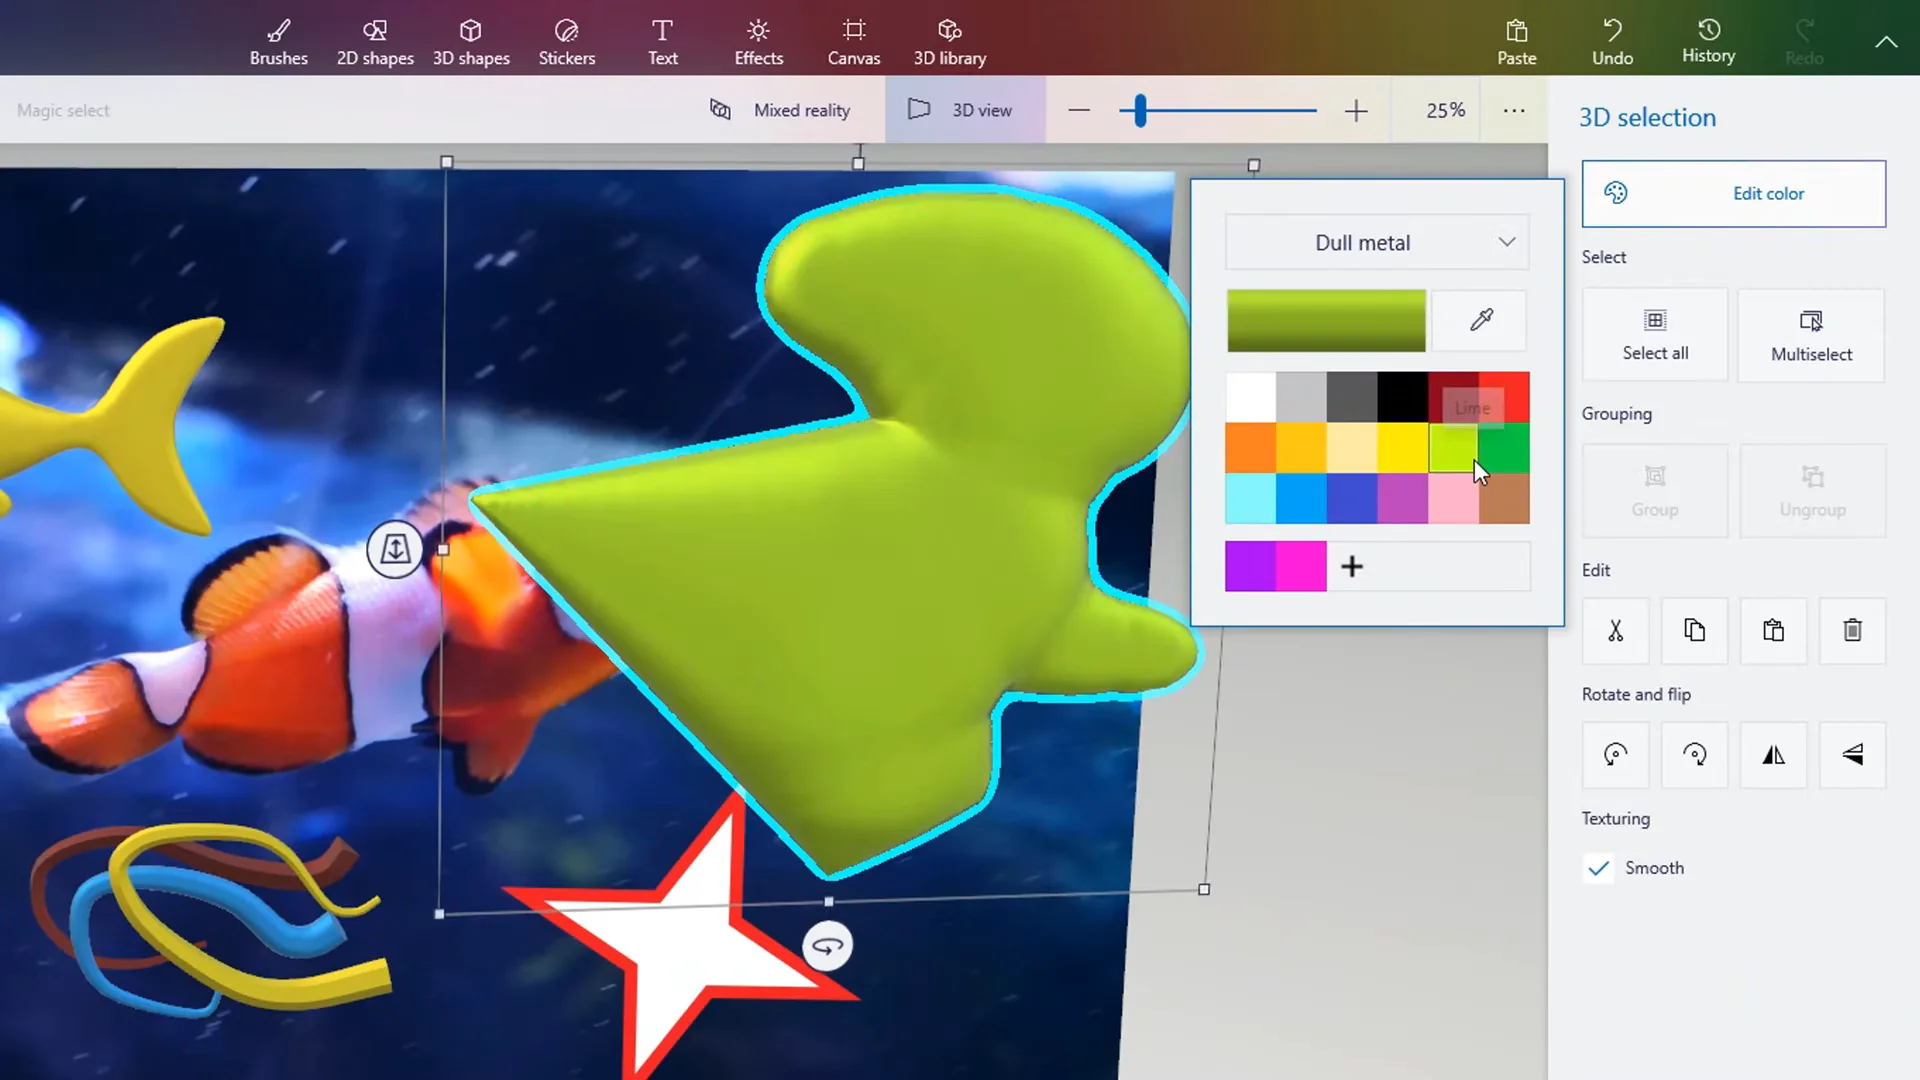
Figure 16: Choose from Matte, Gloss, Dull Metal, or Polished Metal to control how light reflects off your 3D model. -
2
Painting Directly onto 3D Surfaces
You don't need a special texture editor to color your model. Pick any brush from the Brushes tab (such as the spray can, oil brush, or marker) and start drawing right across your 3D model. Paint 3D automatically maps your strokes around the curved surface. You can also drag stickers or pictures onto the model, and they will bend smoothly around the shape.
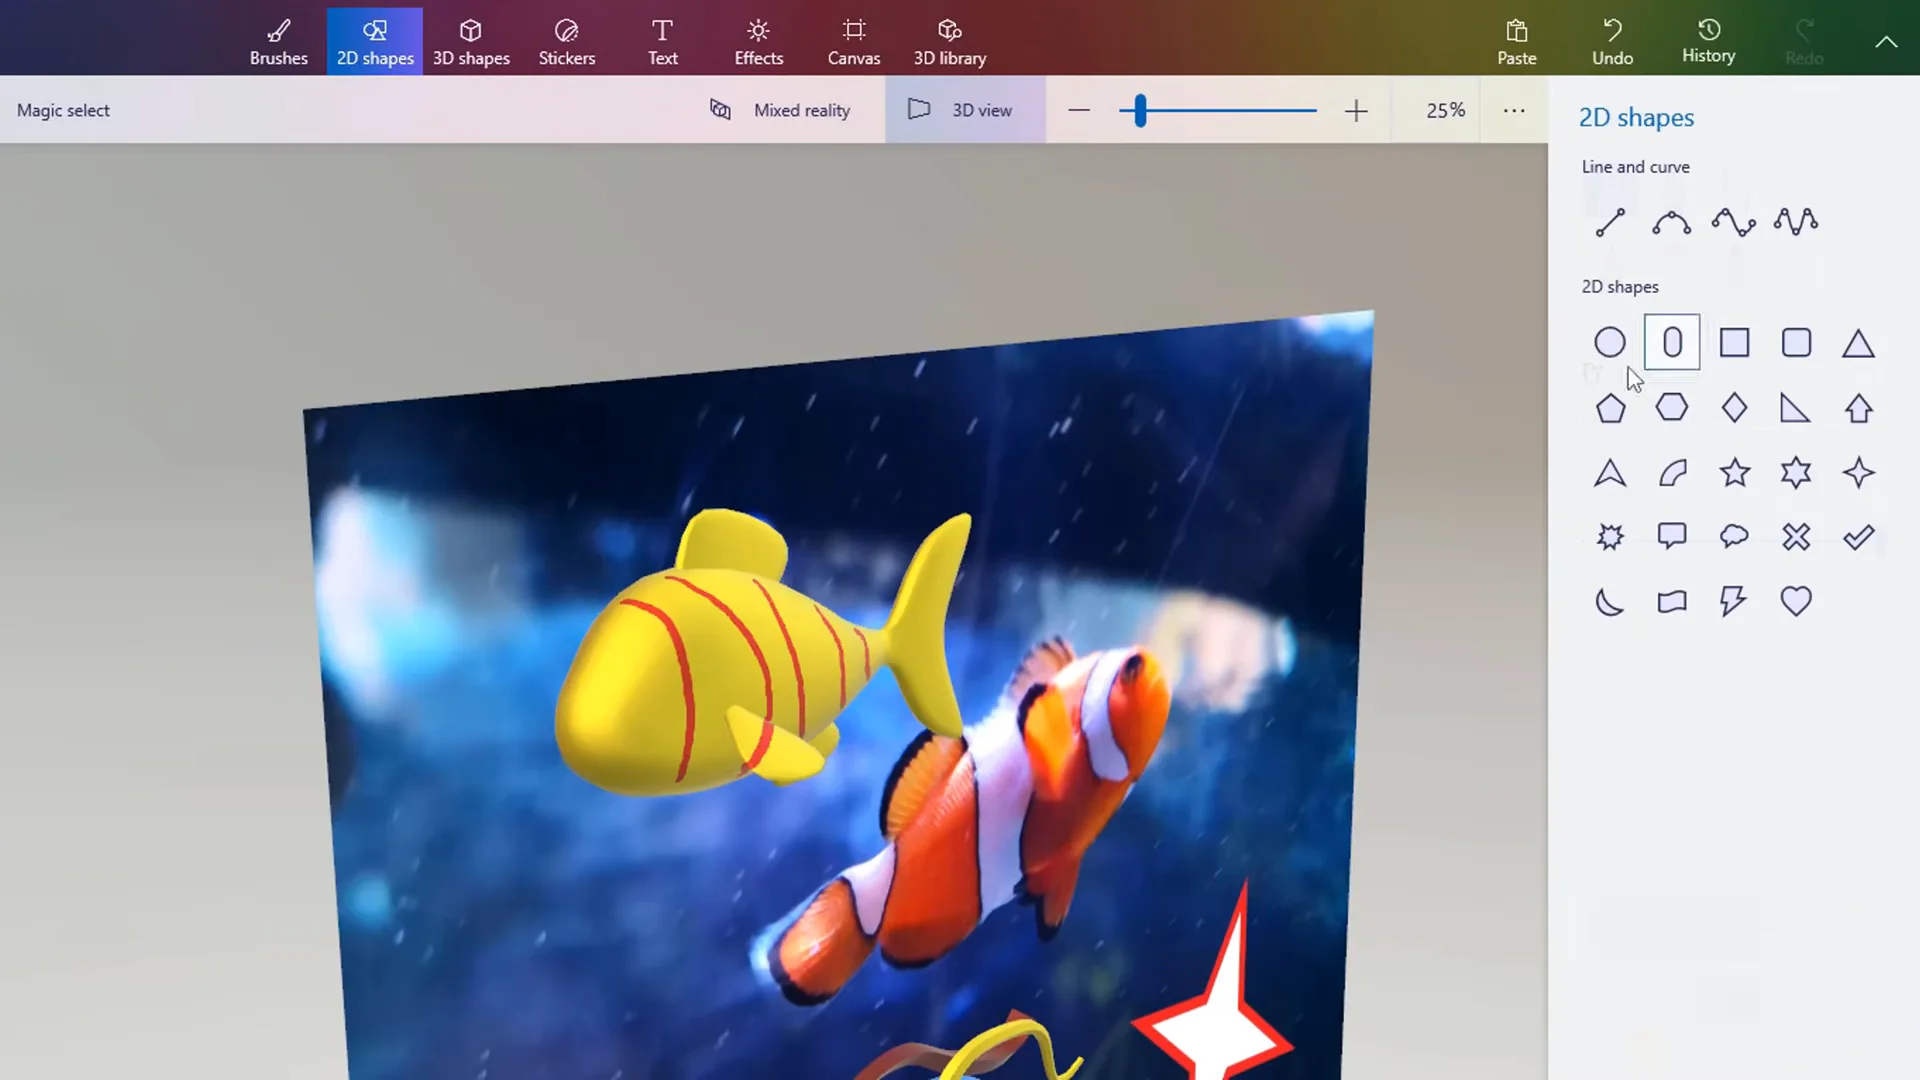
Figure 17: When you paint or place stickers on a 3D model, the color automatically wraps around its curved surfaces.
Combining and grouping multiple 3D shapes
Paint 3D doesn't have complex cutting or sculpting tools, but you can build surprisingly detailed models simply by overlapping basic shapes:
-
1
Position Overlapping Shapes
Position your basic shapes so they overlap, such as placing cylinders against a box to make wheels on a toy car.
-
2
Select Multiple Objects
Switch to the Select tool, hold down the Ctrl key, and click each 3D shape you want to combine (or drag a selection box around all of them).
-
3
Lock into a Group
In the right sidebar, click Group. All of those separate shapes are now linked together as one model. You can resize, move, and rotate the whole group as a single unit without the pieces drifting apart. If you ever need to adjust one piece, just select the group and click Ungroup.
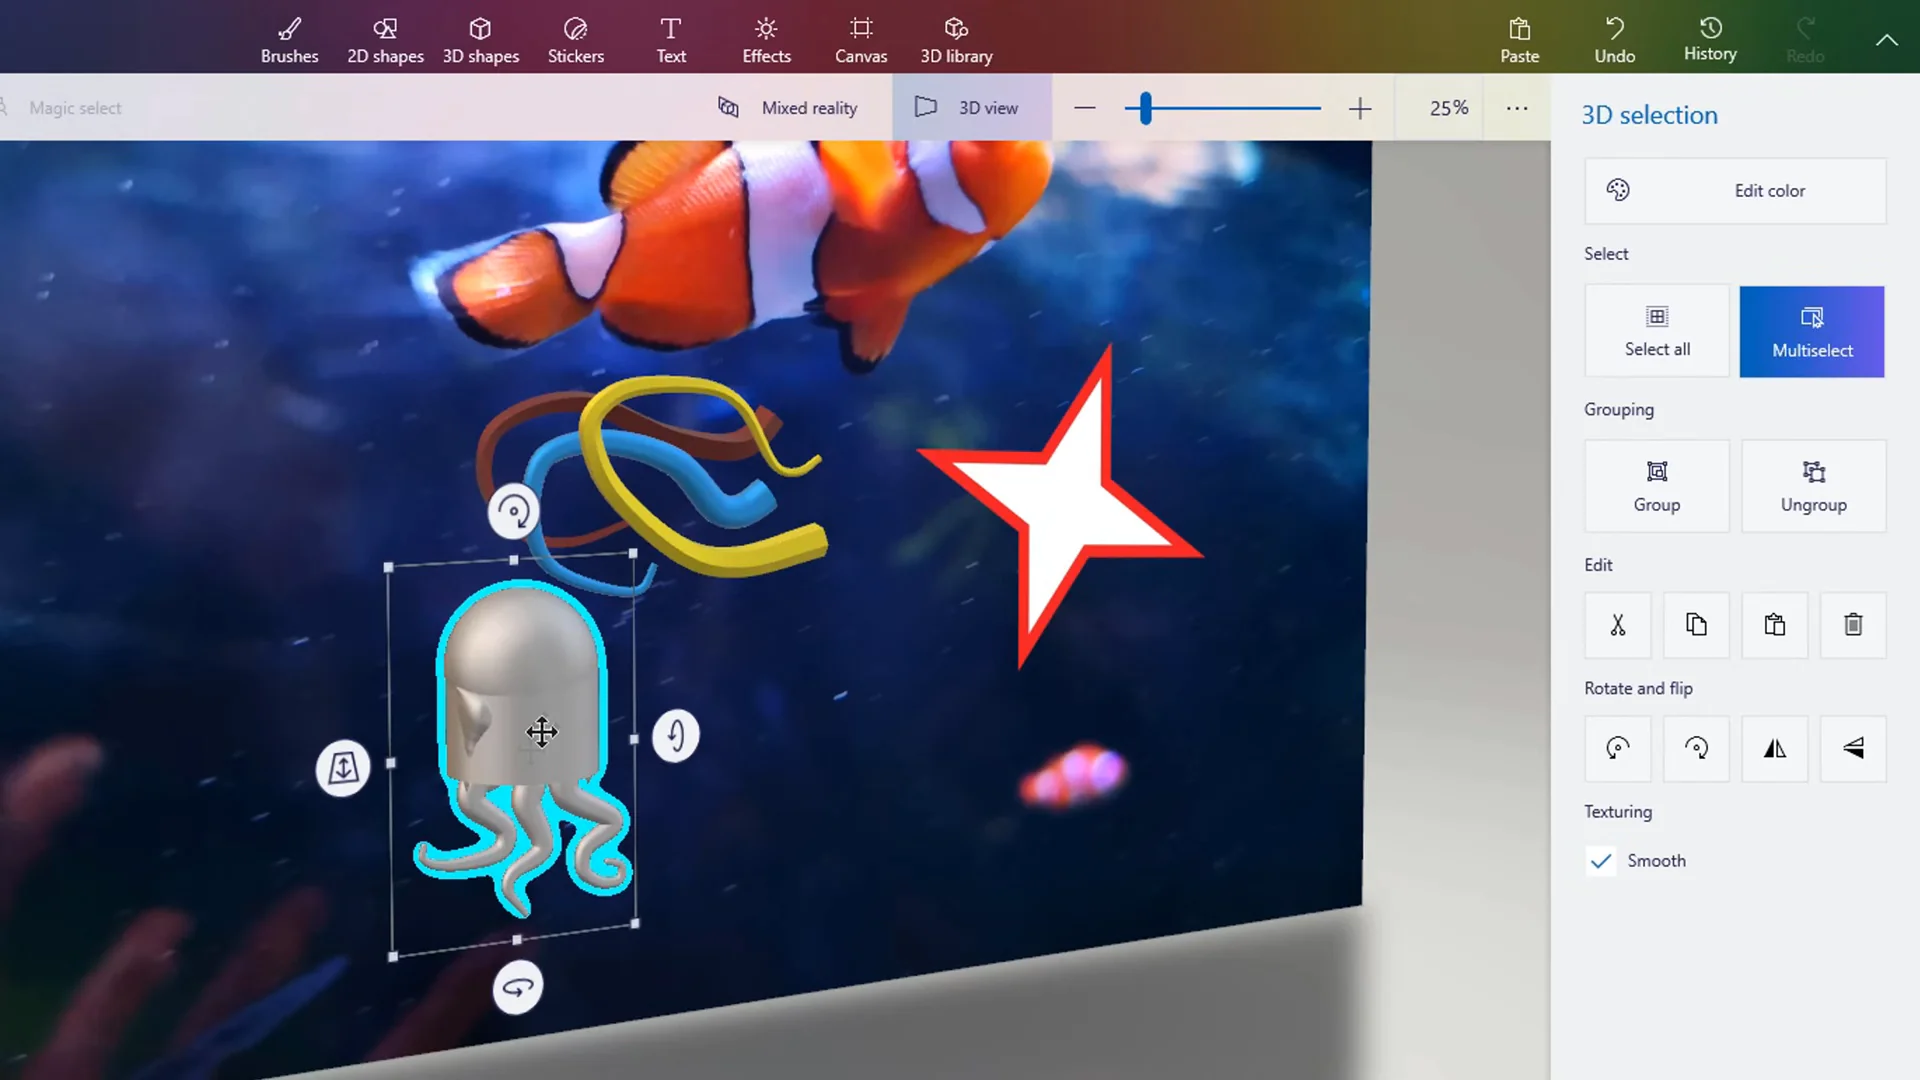
Figure 18: Select multiple 3D objects with Ctrl + click and use Group to lock them together into a single model.
Adding and editing 2D vs. 3D text
Under the Text tab, you have two different options: 2D text and 3D text. It helps to understand the difference before you start typing:
-
1
How to Edit 2D Text
Drag a text box on your canvas, choose your font, and type. Keep in mind: you can only edit 2D text while that typing box is active. As soon as you click outside of it, Paint 3D permanently bakes the letters into the canvas pixels. You cannot click back in to fix typos later. If you clicked away by accident, press Ctrl+Z immediately.
-
2
How to Edit 3D Text
If you want text you can reposition later, pick 3D text. Paint 3D turns your lettering into solid, extruded 3D blocks. While you can't change the spelling once placed, you can select it anytime to move it, rotate it across all three axes, scale it, or change its color and material finish.
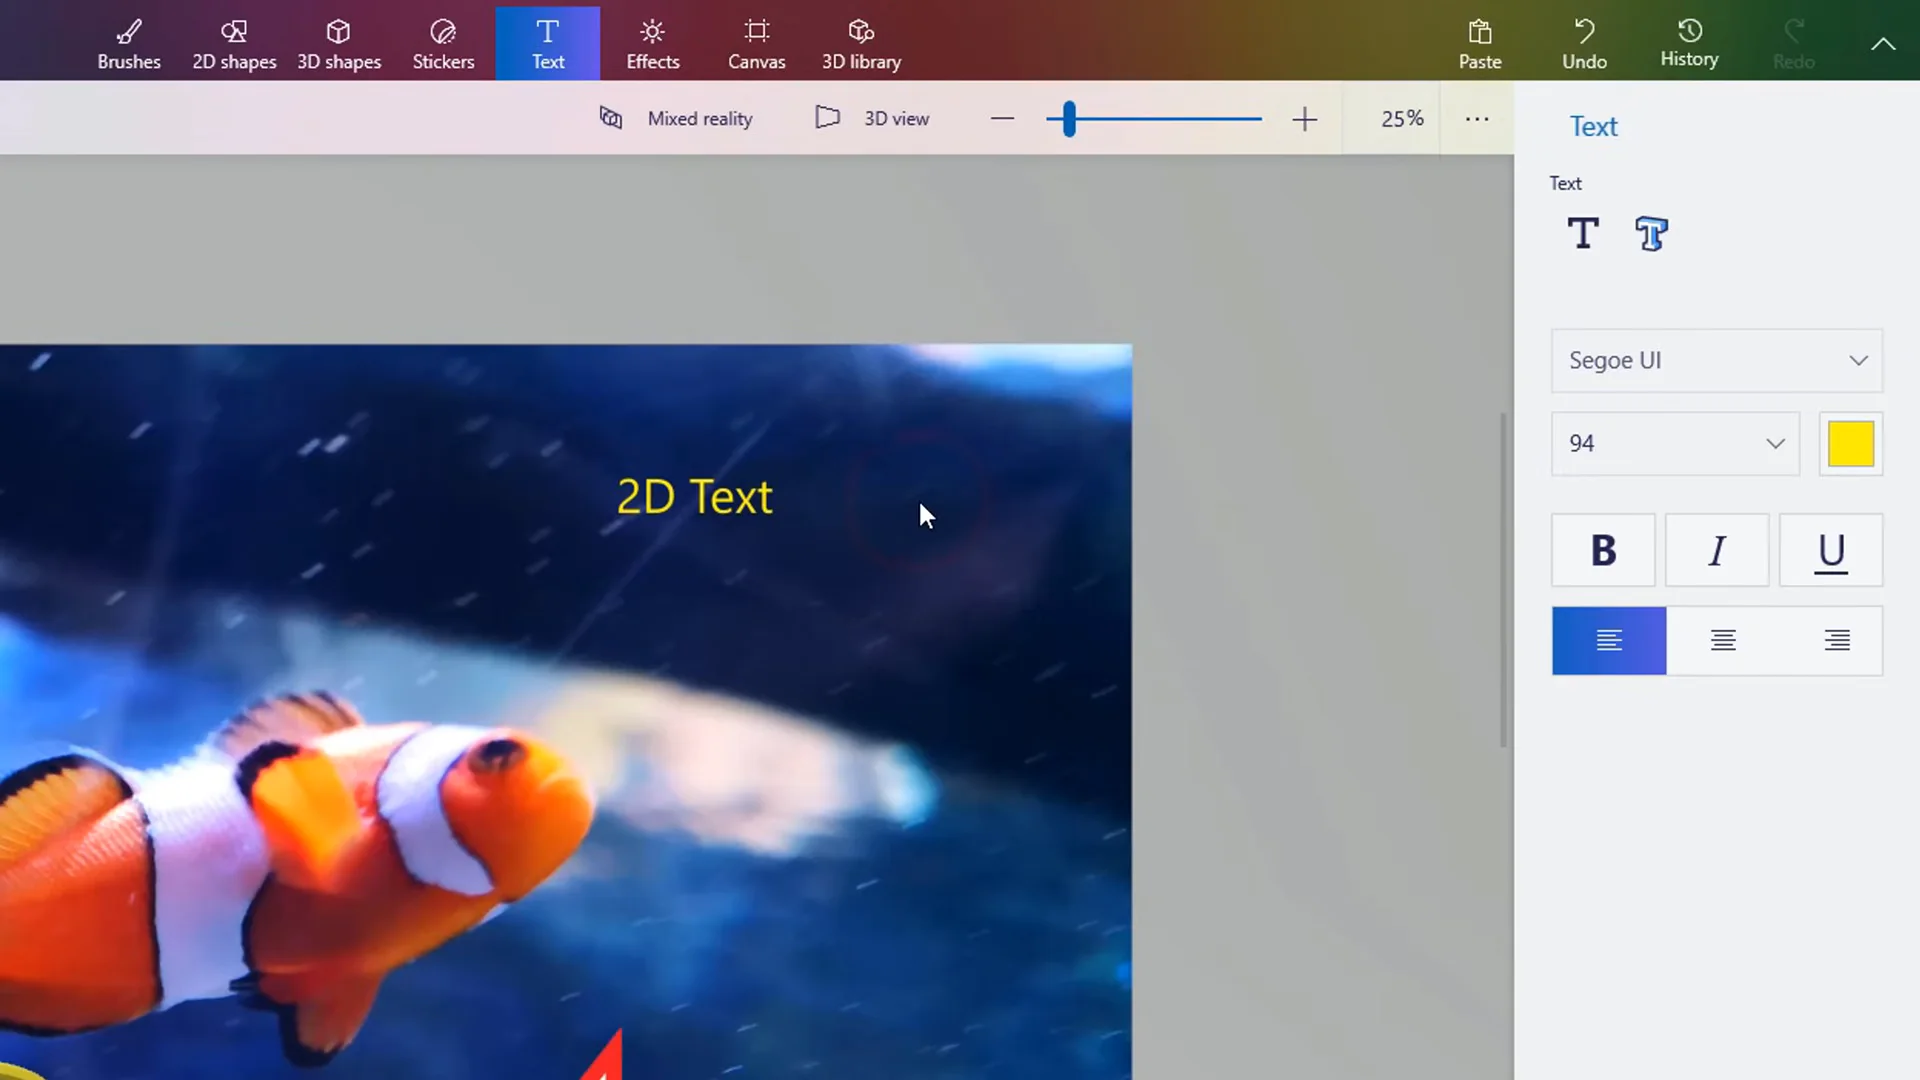
Figure 19: 3D text creates extruded solid letters that you can rotate and position anywhere in 3D space.
Changing the lighting and background
Adjusting the lighting and canvas settings helps your 3D models look more realistic and makes it easy to export clean graphics:
-
1
The Effects Tab (Light Wheel & Mood Filters)
Click the Effects tab at the top. On the right sidebar, you'll see a circular dial with a small sun icon. Drag the sun around the dial to change the angle of the main light source, watching how highlights and shadows shift across your models. You can also pick color filters (like Default, Warm Sun, or Mist) to give your scene a warm, cool, or nighttime feel.
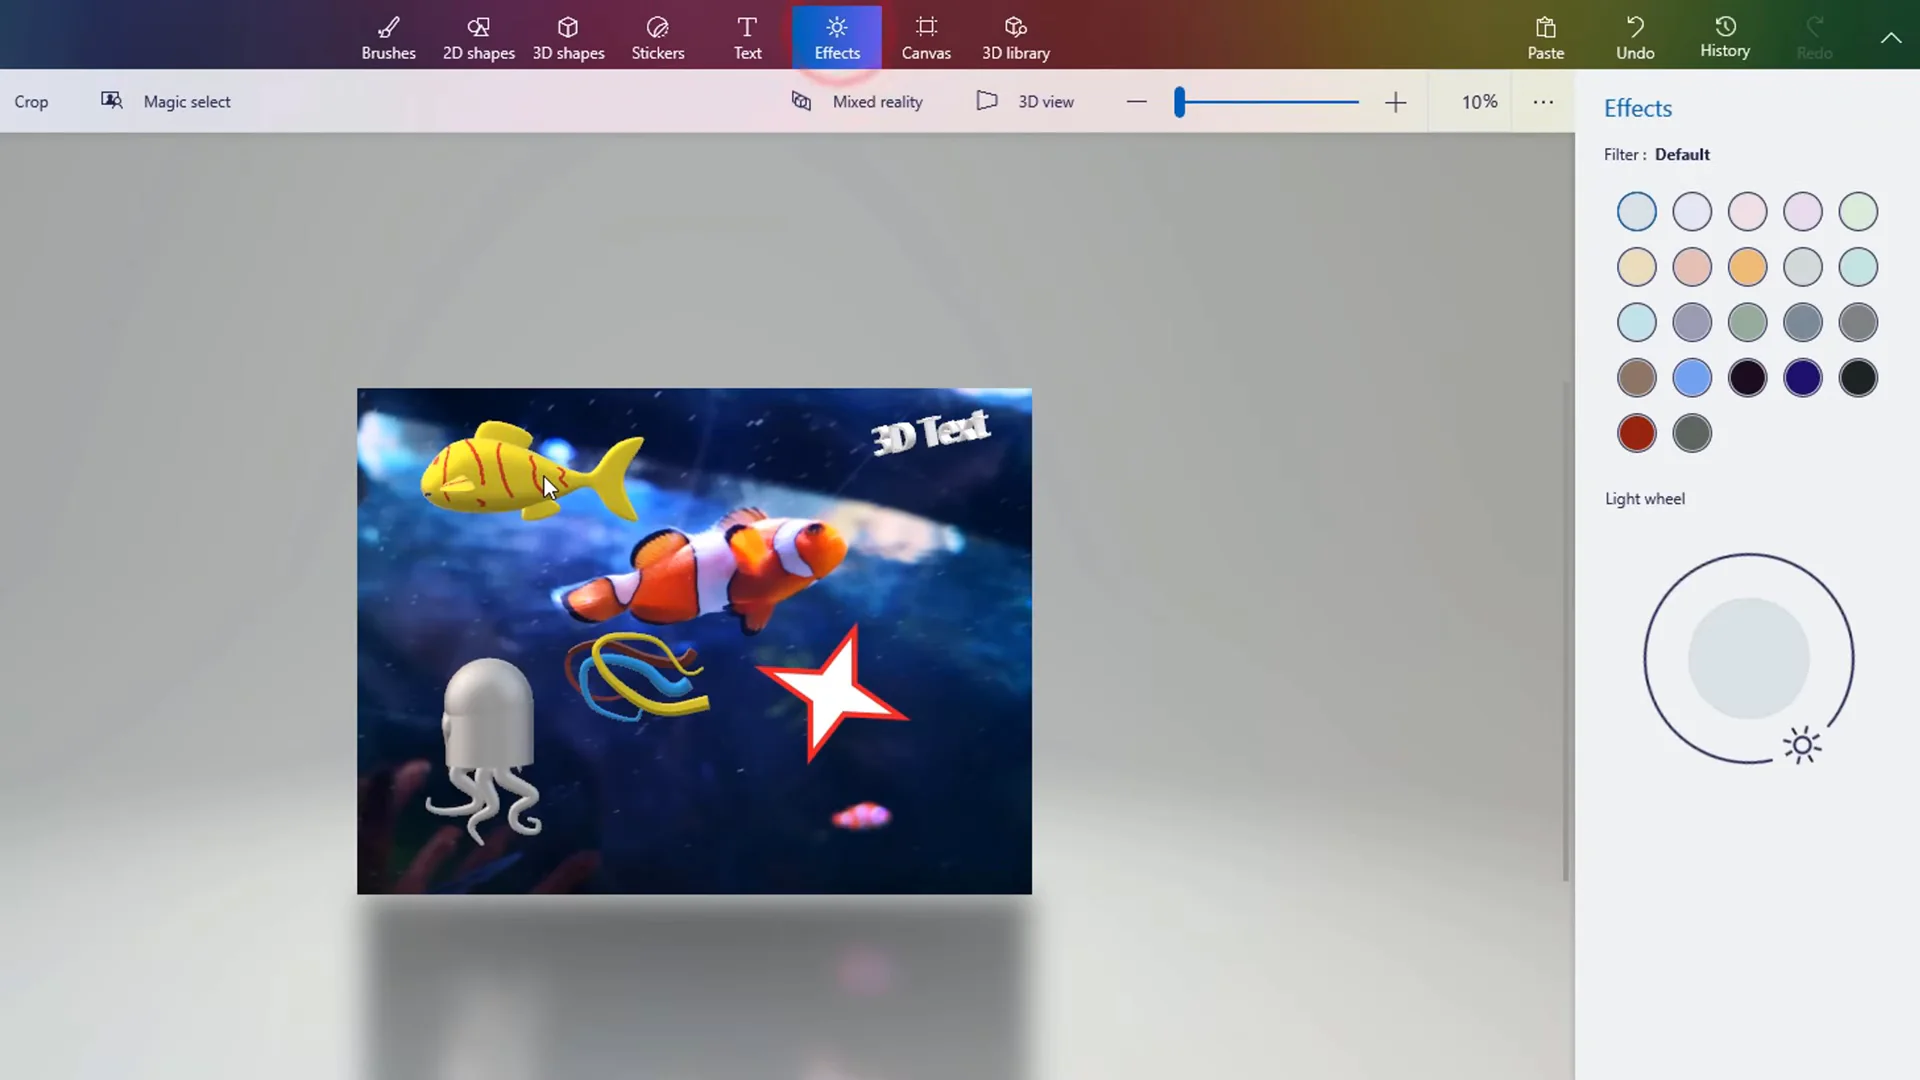
Figure 20: The Effects panel lets you rotate the main light source and choose mood filters to change the scene's atmosphere. -
2
How to Make a Transparent Background in Paint 3D
If you're making a logo, sticker, or cutout to use on a website or in a presentation, you don't want a solid white box around it:
- Click the Canvas tab in the top toolbar.
- Toggle Transparent canvas to ON (or switch Show canvas to OFF). The white canvas immediately turns into a grey transparent workspace.
- When you're ready to save, export your file as a 2D PNG and make sure the Transparency box is checked so the background stays clear.
Previewing your model in Mixed Reality
Near the top right of the Paint 3D toolbar is a button labeled Mixed reality. Clicking it sends your current 3D creation straight into the Windows 3D Viewer app (which comes included on Windows 10 and Windows 11).
-
1
See It in Your Room (AR Camera)
If your computer has a webcam, turn on Mixed Reality inside 3D Viewer. It uses your camera feed to place your 3D model directly onto your desk or floor so you can see how it looks in the real world.
-
2
Studio Lighting View & Turntable Animations
If you don't have a camera, 3D Viewer is still great for checking your work. You can switch between different studio lighting setups, test shadows, and play turntable animations that spin your model smoothly on a pedestal.
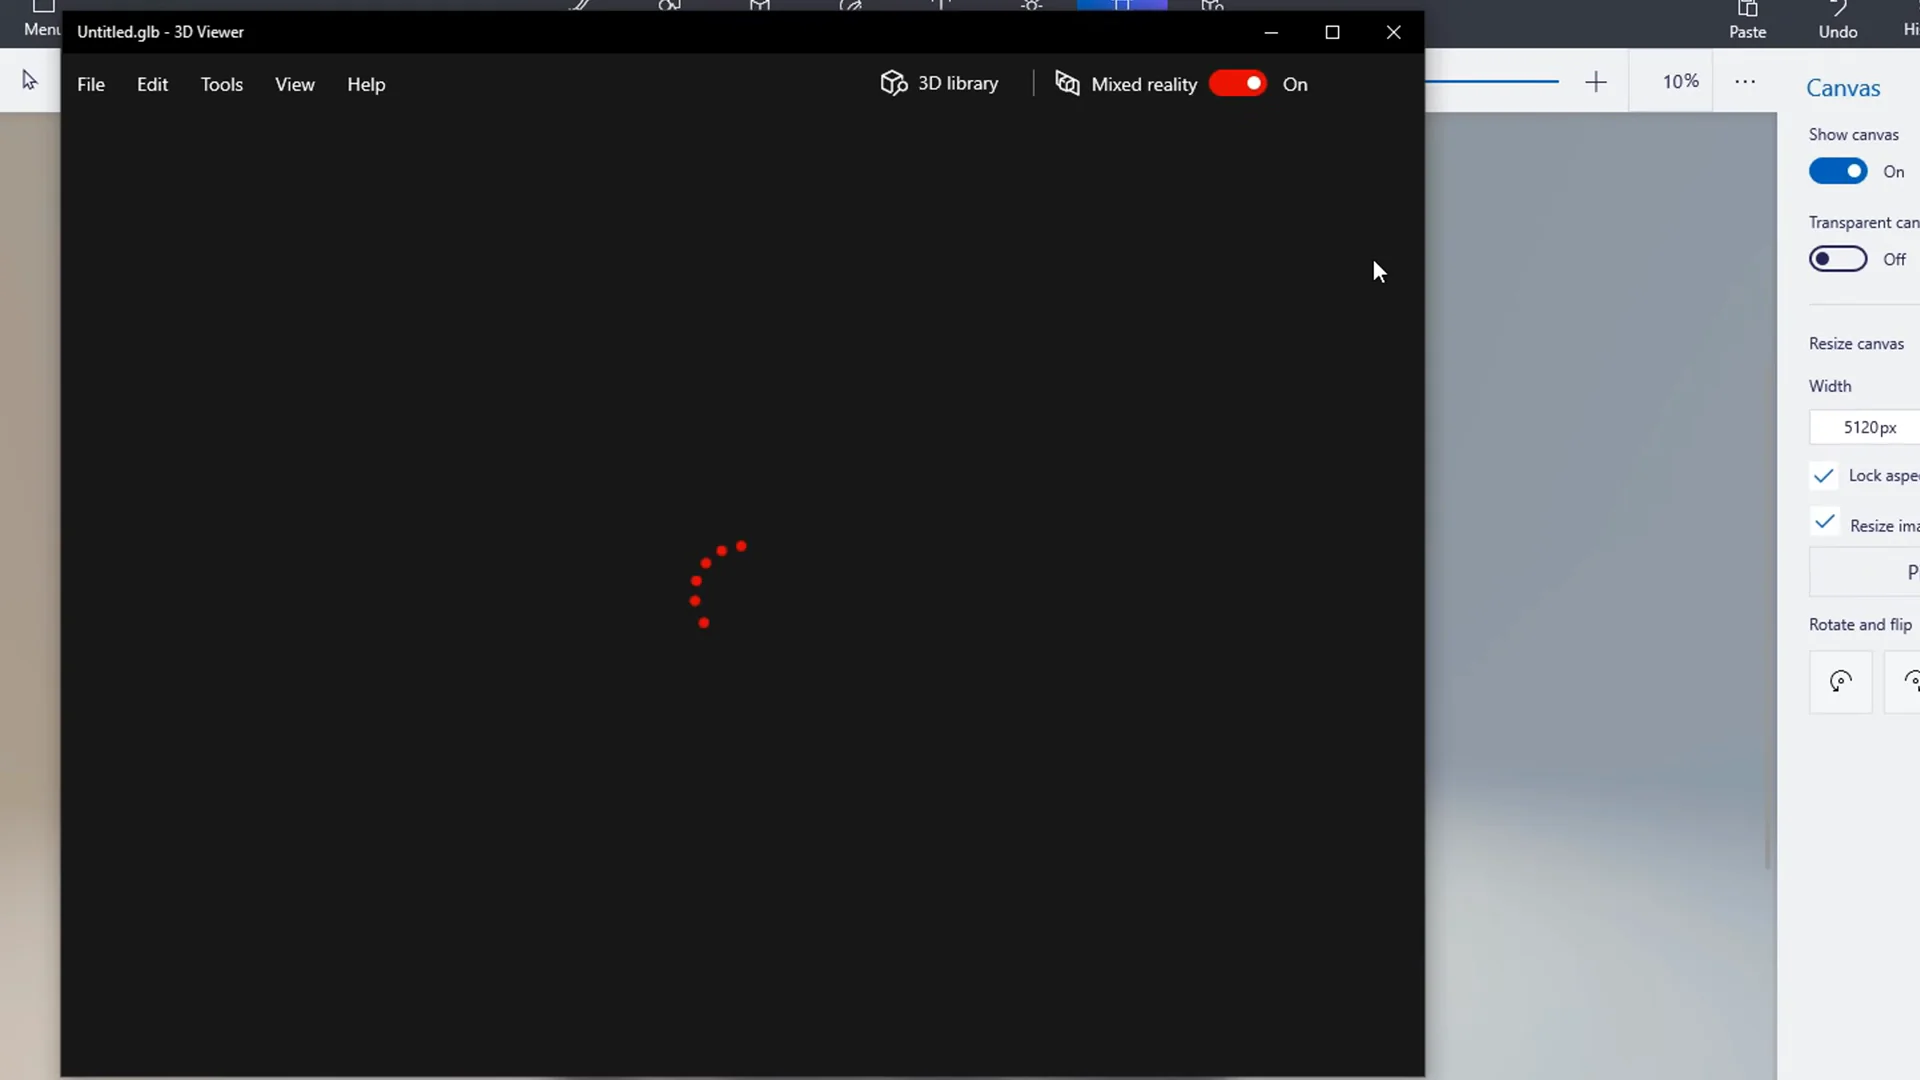
Figure 21: Opening your model in Windows 3D Viewer lets you check it under studio lighting or preview it with your webcam.
Saving your project and exporting 2D, 3D, or video
When your project is finished, click Menu at the top left, then select Save as. Paint 3D gives you four export options depending on how you plan to use your work:
-
1
Paint 3D Project
Saves your master file so you can reopen it anytime and keep moving, editing, or adding shapes. Always keep a project save before exporting.
-
2
Image (PNG, JPG)
Exports a flat picture. Pick 2D PNG with the Transparency box checked if you want your cutouts or 3D art without a background.
-
3
3D Model (.glb, .3mf, .fbx)
Export
.glbfor web and AR,.3mffor standard 3D printing slicing software, or.fbxfor game engines and 3D suites. -
4
Video / GIF Animation
Renders a short animation, such as a turntable spin, swing, or wobble. You can save it as an
.mp4video or an animated.gif.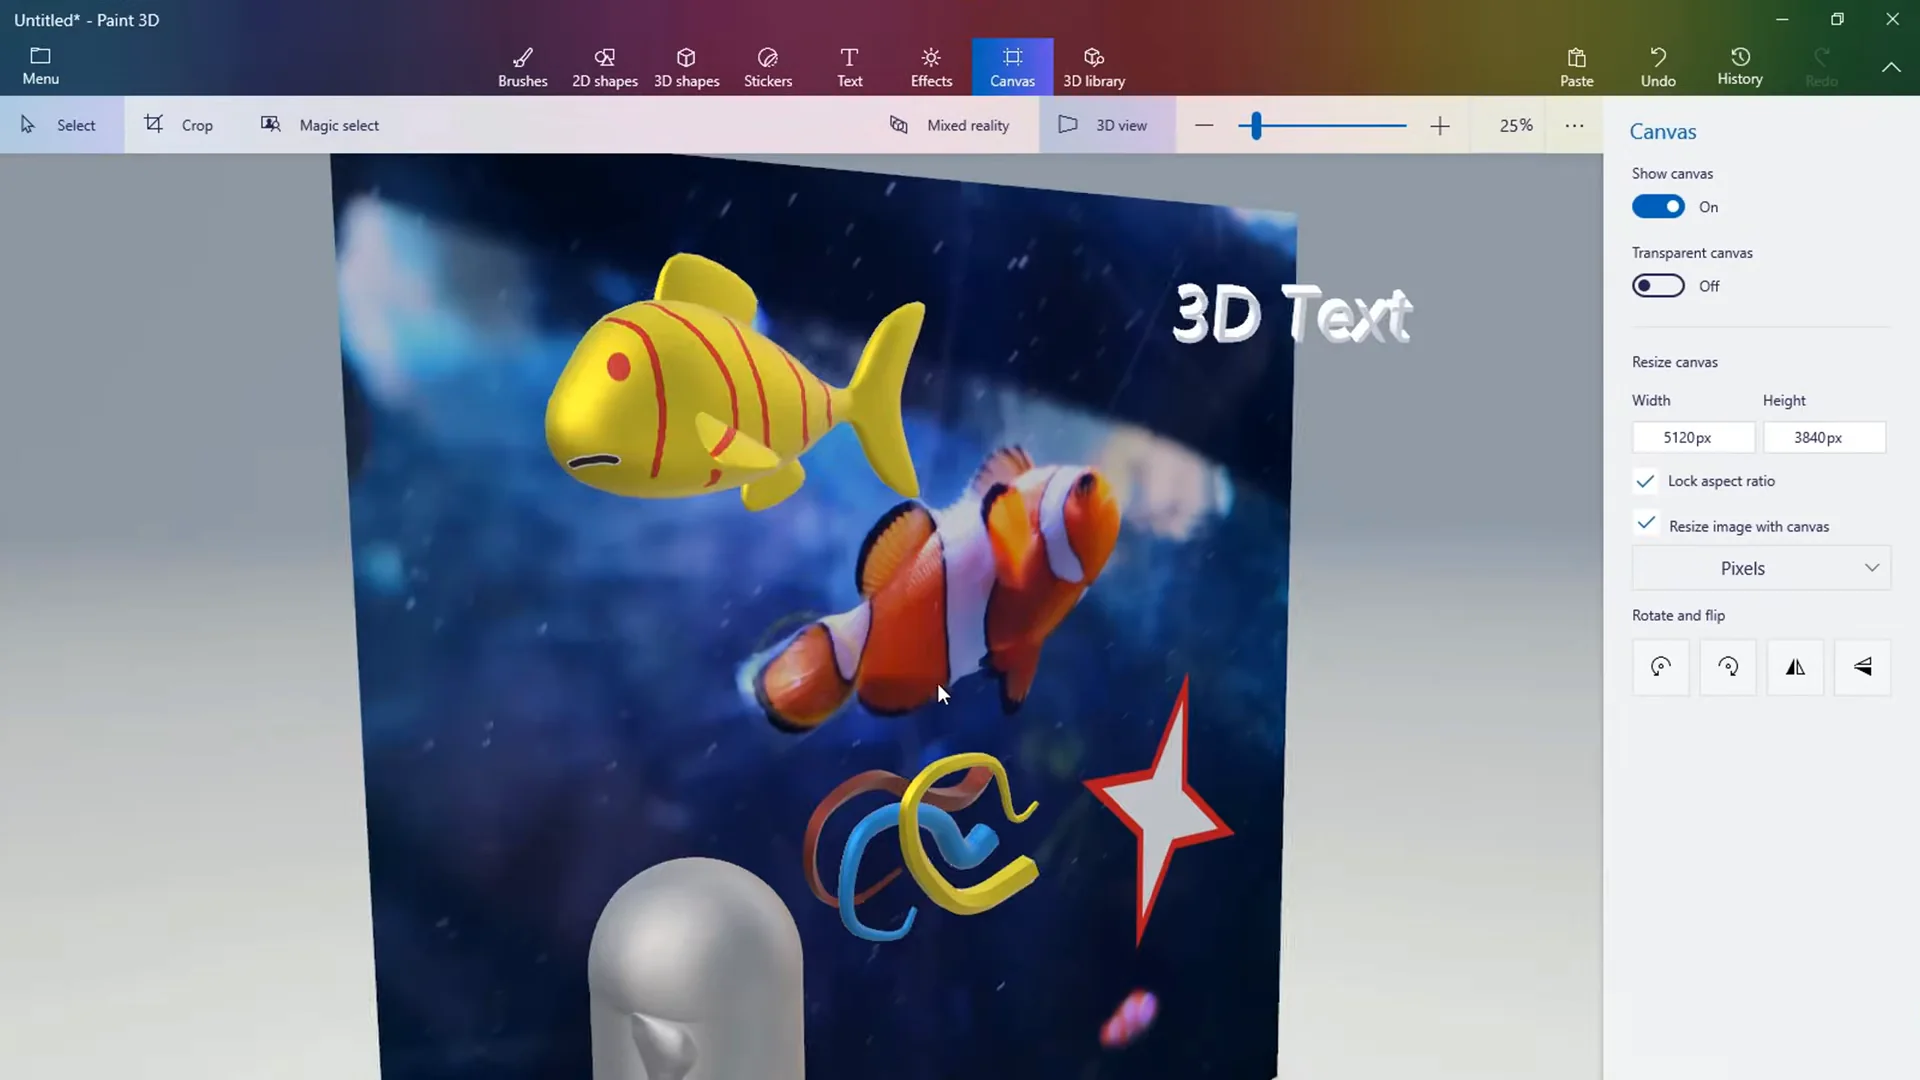
Figure 22: The Save As menu provides project saves, flat images, 3D models (.glb, .3mf, .fbx), and video animations.
Helpful mouse and keyboard shortcuts
These are the most useful mouse and keyboard shortcuts to remember while working in Paint 3D:
| What you want to do | Shortcut / Control | Notes |
|---|---|---|
| Resize without distorting | Shift + Drag corner handle | Keeps your pictures and 2D shapes proportional. |
| Undo your last move | Ctrl+Z | Reverses accidental brush strokes, moves, or clicks away. |
| Paste from clipboard | Ctrl+V | Drops copied images or screenshots straight onto the canvas. |
| Select multiple 3D objects | Ctrl + Click each object | Lets you pick several shapes together to group or move them. |
| Look around in 3D View | Right-Click + Drag | Spins your camera view around the models in 3D space. |
| Slide the camera view | Alt + Drag (or Middle Click) | Moves the view sideways, up, or down without rotating. |
| Zoom in or out | Mouse Wheel Scroll | Scroll forward to zoom into details, backward to zoom out. |
Follow along with the video walkthrough
If you like watching someone demonstrate each tool on screen, here is the full video tutorial by Skills Factory. It walks through all of the features in this guide step by step:
Frequently asked questions
Select your picture on the canvas and click Magic select from the top toolbar. Drag the blue corners tightly around the subject you want to keep, then click Next. Use the Add or Remove pens to touch up any edges, then click Done. Drag your cutout aside, click the leftover background, and press Delete.
Paint 3D does not have a traditional 2D layer list. Instead, layering works through 3D depth: click Make 3D on any shape, sticker, or cutout so it floats off the canvas. Then use the left depth handle on each object to push it backward or pull it forward, controlling which elements sit in front.
Because there is no dedicated blur filter, the easiest workaround is to pick the Watercolor brush or Pixel pen, match your background color, set the Opacity slider to 25% to 35%, and lightly brush over the sensitive text or face. It creates a soft, frosted blur that conceals the details.
Flat 2D text permanently bakes into the background canvas the moment you click outside the box, so you can't re-type it later (press Ctrl+Z immediately if you just did this). If you want text you can reposition, rescale, or recolor later, choose the 3D text tool instead.
Go to the Canvas tab in the top ribbon and switch Transparent canvas to ON. The solid white background will disappear. When you're ready to save, go to Menu > Save As > Image, choose 2D PNG, and confirm that the Transparency box is checked before saving.
Yes. Go to Menu > Save As > 3D model and select the 3MF format. The 3MF format is directly supported by popular 3D slicer programs for sending straight to a 3D printer.
Need to install or fix Paint 3D?
Get the authentic Microsoft package or troubleshoot startup freezes and crash errors.